Contributors

- Marie's Palace Of Tuts
- Hi all my name is Marie. I haven't been doing tuts very long but I have been making tags for about 8 years now. I am disabled. I am a 26 year old. I still live at home with my mom. She is my world. I hope you like it here. If you have any questions or comments email me at PunkLilAngel778@yahoo.com
Blogs I Follow


Stores That I Love

I Am a CT Member of


Wednesday, April 27, 2011
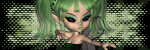
 Because You Loved Me
8:39 AM | Posted by
Marie's Palace Of Tuts |
 Edit Post

Supplies~
Because you loved me Kit By Queen Brat Designs which you can get HERE
I used the art work of Gothique Starr which you can get a license HERE
Mask~MakeAMaskChoice3MF04Slow2010.jpg if this is yours email me and ill add your link
Font~Adios Script
Plugins~
Eye Candy 4
Lokas Gel
DSB Flux
Mura's Filter Meister ~Copies
Open Templete and hold shift & D and close the original. Choose the papers you wanna use and put them in the templete. I try to use one of each. I also add DSB Flux to some of the papers with these settings.
56%
Mix
Open QBD_BecauseULovedMe_Paper10.jpg copy and paste as a new image and move to the bottom and apply your mask. Open QBD_BecauseULovedMe_WordArt01.pspimage copy and paste as a new image and resize to your liking. Open QBD_BecauseULovedMe_HeartFlower01.pspimage copy and paste as a new image and resize to your liking. Duplicate and Mirror. Open QBD_BecauseULovedMe_HeartFlower01.pspimage copy and paste as a new image and resize so its pretty small. Move to the bottom and open Muras Meister and open Copies and use these settings.
33%
Wall Paper
Random
wraparound
Lighten
BG Color~Black
20
50
50
0
100
0
100
0
100
0
0
30
0
Open QBD_BecauseULovedMe_Rose01.pspimage copy and paste as a new image and resize to your liking. Duplicate and mirror. Open QBD_BecauseULovedMe_Heart02.pspimage copy and paste as a new image and resize to your liking. Open QBD_BecauseULovedMe_Bow04.pspimage copy and paste as a new image and resize to your liking. Open QBD_BecauseULovedMe_Key01.pspimage copy and paste as a new image and resize to your liking. Open QBD_BecauseULovedMe_Key01.pspimage copy and paste as a new image and resize so its pretty small. Move to the bottom and open Muras Meister and open Copies and use these settings.
33%
Wall Paper
Random
wraparound
Lighten
BG Color~Black
20
50
50
0
100
0
100
0
100
0
0
30
0
Now add your tube of your choice. Add drop shadows. These were my font settings.
Plugins Lokas Gel.
Do these settings~
Bevel Width~10
Bevel depth~100
Angle straight up and down
Color overlay checked
Color~#830E1A
Color opacity~100
highlight~#FCDCE0
shadow~#4A0810
Now Open Eye Candy 4 with these settings
Glow Width~3
Soft corners~25
Overall Opacity~100
Draw only outside CHECKED
Color~#FBD3D8
Now add your watermark and anything else to make it yours.
Thanks for stopping by please come again soon.
Emo Kitty
8:37 AM | Posted by
Marie's Palace Of Tuts |
Edit Post

Supplies Needed~~
Emo Kitty Scrap Kit by Rieka Rafita can be found HERE
I used the art work of Misticheskaya which you can get a license HERE
Templete 20 by Wild Creationz which you can find HERE
Mask~GrungeMask4_Rose.jpg(if this is your mask email me the link and i will at it up)
Font~Hobo
Plugins~Lokas
Eye Candy 3
Open Templete and hold shift & D and close the original. Choose the papers you wanna use and put them in the templete. I try to use one of each. Open RR_Paper10.jpg copy and paste as a new image and move to bottom. Apply your mask. Open RR_GlitterSplash2.pspimage copy and paste as a new image and resize to your liking. Move it so its right above your mask layer. Open RR_Skull3.pspimage copy and paste as a new image and resize to your liking. Move it so its right below your circle layer. Open RR_SkullKitty.pspimage copy and paste as a new image and resize to your liking. Duplicate and arrange. Open RR_Sparkle1.pspimage copy and paste as a new image and resize to your liking. Move so its right under your circle layer. Open RR_Cat.pspimage copy and paste as a new image and resize to your liking. Open RR_PawPrint1.pspimage & RR_PawPrint2.pspimage copy and paste as a new image and resize to your liking. Duplicate and arrange to your liking. Open RR_Button3.pspimage copy and paste as a new image and resize to your liking. Add drop shadows. These were my font settings. Plugins Lokas Gel
Do these settings~
Bevel Width~10
Bevel depth~100
Angle straight up and down
Color overlay checked
Color~#FF57C6
Color opacity~100
highlight~#FFDBF3
shadow~#C50784
Go To Effects, Plugins, Eye Candy 3 With these Settings
Width~8
Opacity~100
Opacity dropoff~Medium
Color~Black
Draw everywhere~unchecked
Now add your watermark and anything else to make it yours.
Thanks for stopping by please come again soon.
Fashion
8:35 AM | Posted by
Marie's Palace Of Tuts |
Edit Post

Supplies~
Fashion By Peek a boo designs which you can get HERE
Template12_ByRachel_SOE08.psd ( if this is yours email me your info and i will add your link)
I used the artwork of Keith Garvey which can be found HERE
Mask~CircleMask8byJenny.jpg (if this is yours email me your info and i will add your link)
Font~Miss LankfortOpen Templete and hold shift & D and close the original. Choose the papers you wanna use and put them in the templete. I try to use one of each. Open PaBD_fashion_paper8.jpg copy and paste as a new image and resize to your liking. Open PaBD_fashion_ribbon3.pspimage copy and paste as a new image and resize to your liking. Open PaBD_fashion_swirl1.pspimage copy and paste as a new image and resize to your liking. Open PaBD_fashion_wa3.pspimage copy and paste as a new image and resize to your liking. Open PaBD_fashion_lipstick2.pspimage copy and paste as a new image and resize to your liking. Open PaBD_fashion_nailpolish2.pspimage copy and paste as a new image and resize to your liking. Open PaBD_fashion_makeup2.pspimage copy and paste as a new image and resize to your liking. Open PaBD_fashion_earrings1.pspimage copy and paste as a new image and resize to your liking. Open PaBD_fashion_splitpolish2.pspimage & PaBD_fashion_splitpolish1.pspimage copy and paste as a new image and resize to your liking. Duplicate and move right above your mask layer. Open PaBD_fashion_button5.pspimage & PaBD_fashion_button6.pspimage copy and paste as a new image and resize to your liking. Duplicate and arrange to your liking. Add drop shadows. These were my font settings.
Plugins Lokas Gel.
Do these settings~
Bevel Width~10
Bevel depth~100
Angle straight up and down
Color overlay checked
Color~#F15293
Color opacity~100
highlight~#FBBFD8
shadow~#B10B51
Now add your watermark and anything else to make it yours.
Thanks for stopping by please come again soon.
Monday, April 25, 2011
Resolutions
3:09 PM | Posted by
Marie's Palace Of Tuts |
Edit Post

Supplies~
Resolutions Kit By Bello Scarto Designs which you can get HERE
Open Templete and hold shift & D and close the original. Choose the papers you wanna use and put them in the templete. I try to use one of each. Open bs-res-9.pspimage copy and paste as a new image and resize to your liking. Move it so its under the second circle on your templete. Open bs-res-1.pspimage & bs-res-2.pspimage copy and paste as a new image and resize to your liking. Open bs-res-29.pspimage copy and paste as a new image and resize to your liking. Open bs-res-50.pspimage & bs-res-49.pspimage copy and paste as a new image and resize to your liking. Move to the bottom. Open bs-res-7.pspimage copy and paste as a new image and resize to your liking. Duplicate and arrange them around the bottom on top of the tube of your choice. Add drop shadows. These were my font settings.
Plugins Lokas Gel.
Do these settings~
Bevel Width~10
Bevel depth~100
Angle straight up and down
Color overlay checked
Color~
Color opacity~100
highlight~
shadow~
Now add your watermark and anything else to make it yours.
Thanks for stopping by please come again soon.
Fairy Nightmare
3:06 PM | Posted by
Marie's Palace Of Tuts |
Edit Post

Supplies Needed~
Fairy Nightmare Kit By Tamie (Addictive Pleasures) You can get HERE
I used the art work of Gothique Starr which you can get a license HERE
KyLie_MF-Template15.psd which cane be found HERE
Mask~Used one in templete
Font Used~AmbianceBT
Plugins
DSB Flux
Lokas Gel
Eye candy 3
Open Templete and hold shift & D and close the original. Choose the papers you wanna use and put them in the templete. I try to use one of each. Open decor.pspimage copy and paste as a new image and resize to your liking. Open doodle.pspimage copy and paste as a new image and resize to your liking. Move to the bottom rotate it by 60% and duplicate so its in the right upper corner and left lower corner. Open Butterfly2.pspimage copy and paste as a new image and resize to your liking. duplicate and put them on the doodles. Open flower3.pspimage copy and paste as a new image and resize to your liking. Duplicate and mirror. Open Butterfly.pspimage copy and paste as a new image and resize to your liking. Duplicate and mirror. I took the tube i used by Gothique Starr and erased the body and just put the face in each little circle and I greyscaled it. Open ribbon.pspimage copy and paste as a new image and resize to your liking. Duplicate and mirror and add dsb flux to it
I did lighter and at 40%. Open feather3.pspimage copy and paste as a new image and resize to your liking. Duplicate and mirror. Put the around each little circle. Add drop shadows. These were my font settings. Plugins Lokas Gel
Do these settings~
Bevel Width~10
Bevel depth~100
Angle straight up and down
Color overlay checked
Color~#24245A
Color opacity~100
highlight~#C0C1E8
shadow~#121328
Go To Effects, Plugins, Eye Candy 3 With these Settings
Width~8
Opacity~100
Opacity dropoff~Medium
Color~Black
Draw everywhere~unchecked
Now add your watermark and anything else to make it yours.
Thanks for stopping by please come again soon.
Thursday, April 21, 2011
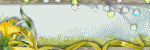
Whispered Garden
2:52 PM | Posted by
Marie's Palace Of Tuts |
Edit Post

Supplies~
Whispered Garden Kit By Foxy Designs which you can get HERE
Open Templete and hold shift & D and close the original. Choose the papers you wanna use and put them in the templete. Open Colordrops_FD.pspimage copy and paste as a new image and resize to your liking. Move to the bottom. Open GlitterSpray2_FD.pspimage copy and paste as a new image and resize to your liking. Duplicate and move both to the bottom. Open GlitterSpray1_FD.pspimage copy and paste as a new image and resize to your liking. Duplicate and mirror. Open Butterfly1_FD.pspimage copy and paste as a new image and resize to your liking. Duplicate and mirror. Open Flower8_FD.pspimage & Flower9_FD.pspimage copy and paste as a new image and resize to your liking. Duplicate and mirror. Add drop shadows. These were my font settings.
Plugins Lokas Gel.
Do these settings~
Bevel Width~10
Bevel depth~100
Angle straight up and down
Color overlay checked
Color~#9FC789
Color opacity~100
highlight~#DAE9D1
shadow~#68974B
Now add your watermark and anything else to make it yours.
Thanks for stopping by please come again soon.
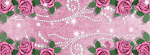
Spring Love
2:47 PM | Posted by
Marie's Palace Of Tuts |
Edit Post

Supplies~
Lillians Spring By Baby V which you can get HERE
Templete 327 by Missy Which you can get HERE
Open Templete and hold shift & D and close the original. Choose the papers you wanna use and put them in the templete. Open BabyV_Lillian's Spring_frame2.pspimage copy and paste as a new image and resize to your liking. Open BabyV_Lillian's Spring_ele2.pspimage & BabyV_Lillian's Spring_ele3.pspimage copy and paste as a new image and resize to your liking. Move down and duplicate to your liking. Open BabyV_Lillian's Spring_flower2.pspimage & BabyV_Lillian's Spring_flower3.pspimage copy and paste as a new image and resize to your liking. Duplicate and arrange around the frame. Open BabyV_Lillian's Spring_flowerbranch1.pspimage & BabyV_Lillian's Spring_flowerbranch2.pspimage copy and paste as a new image and resize to your liking. and having going around the circle. Add drop shadows. These were my font settings.
Plugins Lokas Gel.
Do these settings~
Bevel Width~10
Bevel depth~100
Angle straight up and down
Color overlay checked
Color~#E2E35B
Color opacity~100
highlight~#F8F8D2
shadow~#9E9F1D
Now add your watermark and anything else to make it yours.
Thanks for stopping by please come again soon.
Wednesday, April 20, 2011
Candy PunkD
1:37 PM | Posted by
Marie's Palace Of Tuts |
Edit Post

Supplies Needed~
Candy Punkd Kit By Vicki (Pink Princess) You can get HERE
I used the art work of Lady Mishka which you can get a license HERE
Collab Templete 4 by Aqua & Sylvie which can be found HERE
Font Used~AL Hurried Note
Plugins~
Lokas Gel
Eye Candy 3
Open the templete hit shift and D and close the original. Choose the papers you want and place them into the templete. I took a closeup of the tube of my choice and resized it a little and erased the access and made the opacity to 60. Open ele42.pspimage copy and paste as a new image and resize to your liking. I made it go around the face in the circle. Open ele62.pspimage & ele63.pspimage duplicate both and arrange them so its around the circle. Open ele8.pspimage & ele9.pspimage copy and paste as a new image and resize to your liking. Duplicate and arrange to your liking...i moved them so they were around the square frames. Open ele11.pspimage copy and paste as a new image and resize to your liking. Duplicate and arrange to your liking...i moved them so they were around the square frames. Open ele7.pspimage & ele6.pspimage copy and paste as a new image and resize to your liking. Add drop shadows. These were my font settings. Plugins Lokas Gel
Do these settings~
Bevel Width~10
Bevel depth~100
Angle straight up and down
Color overlay checked
Color~#4DC1E6
Color opacity~100
highlight~#E1F5FB
shadow~#1C91B2
Go To Effects, Plugins, Eye Candy 3 With these Settings
Width~6
Opacity~100
Opacity dropoff~Medium
Color~Black
Draw everywhere~unchecked
Now add your watermark and anything else to make it yours.
Thanks for stopping by please come again soon.
Monday, April 18, 2011
Music
3:02 PM | Posted by
Marie's Palace Of Tuts |
Edit Post

Supplies~
Music kit by Deanna (Butterfly Kisses Scraps) which can be found HERE
Mask~CircleMask8byJenny.jpg (if this is your mask email me the link and i will at it up)
TracyF.Designz-Template12.psd which can be found HERE
I used the artwork of Ismael Rac which can be found HERE
Font~1 Squirt DNA
Plugins~Lokas
Eye Candy 3
Open the templete hit shift & D and close the orinigal. I used papers Paper18.png & Paper17.png & Paper20.png & Paper19.png fvor my templete. You use the ones you like best. Open Mesh02.pspimage copy and paste as a new image and move to the bottom and apply your mask. Open GlitterSplatter01.pspimage copy and paste as a new image and move right above the mesh. Open Swirl02.pspimage copy and paste as a new image and move right above the mesh. Duplicate and mirror and make sure they are in each corner. Open IPod02.pspimage copy and paste as a new image and resize to your liking. Open IPod01.pspimage copy and paste as a new image and resize to your liking. Open Butterfly01.pspimage copy and paste as a new image and resize to your liking. Open FunkySquare01.pspimage copy and paste as a new image and resize to your liking. Open Note01.pspimage copy and paste as a new image and resize to your liking. Open Note04.pspimage copy and paste as a new image and resize to your liking. Open Note03.pspimage copy and paste as a new image and resize to your liking. Open Note02.pspimage copy and paste as a new image and resize to your liking.
Add drop shadows. These were my font settings. Plugins Lokas Gel
Do these settings~
Bevel Width~10
Bevel depth~100
Angle straight up and down
Color overlay checked
Color~#51FF4C
Color opacity~100
highlight~#C6FFC5
shadow~#05CA00
Go To Effects, Plugins, Eye Candy 3 With these Settings
Width~6
Opacity~100
Opacity dropoff~Medium
Color~Black
Draw everywhere~unchecked
Now add your watermark and anything else to make it yours.
Thanks for stopping by please come again soon.
Love Hurts
2:56 PM | Posted by
Marie's Palace Of Tuts |
Edit Post

Supplies~
Love Hurts Kit By A Taggers Scrap which you can get HERE
Open the templete and hold shift & D and close the original. Choose the papers you wanna use and add them in. I glittered the slats in the templete I used DSB Flux. Use these settings
Intensity~26
Direction~mix
Open swirl1.pspimage copy and paste as a new image and resize to your liking. Move so its right above your mask. Duplicate and mirror so there is one in each corner. Open electricburst.pspimage copy and paste as a new image and resize to your liking. Duplicate and mirror. Open flower5.pspimage copy and paste as a new image and resize to your liking. Duplicate and arrange to the bottom of the circle. Open flower3.pspimage copy and paste as a new image and resize to your liking. Duplicate and arrange to the bottom of the circle. Open heartsandhandcuffs.pspimage copy and paste as a new image and resize to your liking. Duplicate and mirror. Open cuffs3.pspimage copy and paste as a new image and resize to your liking. Open tickler3.pspimage copy and paste as a new image and resize to your liking. Add drop shadows. These were my font settings.
Plugins Lokas Gel.
Do these settings~
Bevel Width~10
Bevel depth~100
Angle straight up and down
Color overlay checked
Color~#FD396F
Color opacity~100
highlight~#FDBDD1
shadow~#970330
Now add your watermark and anything else to make it yours.
Thanks for stopping by please come again soon.
Monday, April 11, 2011
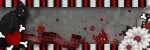
Toxic Candy
6:11 PM | Posted by
Marie's Palace Of Tuts |
Edit Post

Supplies Needed~~
Toxic Candy Scrap Kit by Rieka Rafita can be found HERE
I used the art work of Zlata M which you can get a license HERE
Yvette_EOC_Template48.psp which you can find HERE
Mask~diamond4dee-vi.jpg(if this is your mask email me the link and i will at it up)
Font~Hobo
Plugins~Lokas
Eye Candy 3
Open the templete and hit shift and D and close the original. Now you choose the papers to add to the templete and add them. Open RR_Paper15.jpg copy and paste as a new image and apply your mask. Move to the bottom. Open RR_Skull-Doodle.pspimage copy and paste as a new image and resize to your liking. Open RR_AlphaHeart.pspimage copy and paste as a new image and resize to your liking. Open RR_Flower2.pspimage copy and paste as a new image and resize to your liking. Open RR_Flower1.pspimage copy and paste as a new image and resize to your liking. Open RR_FlutterbySkull.pspimage copy and paste as a new image and resize to your liking. Open RR_Diamond.pspimage copy and paste as a new image and resize to your liking. Add drop shadows. These were my font settings. Plugins Lokas Gel
Do these settings~
Bevel Width~10
Bevel depth~100
Angle straight up and down
Color overlay checked
Color~#26D28B
Color opacity~100
highlight~#C0F6DE
shadow~#198556
Go To Effects, Plugins, Eye Candy 3 With these Settings
Width~8
Opacity~100
Opacity dropoff~Medium
Color~Black
Draw everywhere~unchecked
Now add your watermark and anything else to make it yours.
Thanks for stopping by please come again soon.
CRUNK
5:14 PM | Posted by
Marie's Palace Of Tuts |
Edit Post

Supplies~
CRUNK Collab Kit By Sky & Pink Princess which you can get HERE
I used the art work of Keith Garvey (formally of MPT now with PTE) which you can get a license HERE
Font~Tartine Black
Open the templete hold shift and D and close the original. Now choose the papers of your choice and fill in the templete. Open SkyScraps-Crunk-E38.pspimage copy and paste as a new image and resize to your liking. Duplicate and move down. Open SkyScraps-Crunk-E39.pspimage copy and paste as a new image and resize to your liking. Duplicate and move down. Open SkyScraps-Crunk-E10.pspimage copy and paste as a new image and resize to your liking. Duplicate and move down. Open ele50.pspimage copy and paste as a new image and resize to your liking. Duplicate and mirror. Open ele29.pspimage copy and paste as a new image and resize to your liking. Open ele30.pspimage copy and paste as a new image and resize to your liking. Open ele28.pspimage copy and paste as a new image and resize to your liking. Add drop shadows. These were my font settings.
Plugins Lokas Gel.
Do these settings~
Bevel Width~10
Bevel depth~100
Angle straight up and down
Color overlay checked
Color~#02748D
Color opacity~100
highlight~#CBF7FF
shadow~#013C47
Now add your watermark and anything else to make it yours.
Thanks for stopping by please come again soon.
Blue Diamonds
5:12 PM | Posted by
Marie's Palace Of Tuts |
Edit Post

Supplies~
Blue Diamonds Kit By Baby V Designs which you can get HERE
Templete 73 by Designs by Ali which can be found HERE
Mask~CircleMask8byJenny.jpg(if this is yours email me your link)Font~Candy Script
Open the templete and hit shift and D and close the original. Place the papers in the templete. Open BabyV_BlueDiamonds_paper1.jpg copy and paste as a new image and apply your mask. Move to the bottom. Open BabyV_BlueDiamonds_flowerele2.pspimage copy and paste as a new image and resize to your liking. Move to the bottom and duplicate and mirror. Open BabyV_BlueDiamonds_diamondframe.pspimage copy and paste as a new image and resize to your liking. Open BabyV_BlueDiamonds_Diamond Flower Swirl.pspimage copy and paste as a new image and resize to your liking. Rotate by 60%. Open BabyV_BlueDiamonds_fabricflower.pspimage copy and paste as a new image and resize to your liking. Duplicate and mirror. Open medi_aliss cook4.pspimage copy and paste as a new image and resize to your liking. Add drop shadows. These were my font settings.
Plugins Lokas Gel.
Do these settings~
Bevel Width~10
Bevel depth~100
Angle straight up and down
Color overlay checked
Color~#2455CC
Color opacity~100
highlight~#C4D2F6
shadow~#183682
Now add your watermark and anything else to make it yours.
Thanks for stopping by please come again soon.
Wednesday, April 6, 2011
Emo Punk
5:04 PM | Posted by
Marie's Palace Of Tuts |
Edit Post

Supplies~
Emo Punk Kit By Pink Candy Designs which you can get HERE
I used the art work of Eugene Rzhevskii which you can get a license HERE
Templete 13 by TCDzines which you can get HERE
Mask~GrungeMask4byJenny.jpg(if this is yours email me your link)
Font~KosalSaysHy
Open your templete and hold shift and D and close the original Now I used the papers from the scrapkit to fill in the boxes of the templete. You choose which papers you like and do the same thing. I also added Texture to the square at the bottom. I added weave to the circle. You choose which you wanna do and play with it to make it yours. Open pp10.png copy and paste as a new image and move to the bottom and apply your mask. Open splat2.pspimage move right above your mask layer and duplicate so its in each corner. Open flame.pspimage copy and paste as a new image and resize to your liking. Duplicate and mirror. Open star.pspimage copy and paste as a new image and resize to your liking. Duplicate and mirror. Open candy3.pspimage copy and paste as a new image and resize to your liking. Duplicate as many as times and mirror. Add drop shadows. These were my font settings.
Plugins Lokas Gel.
Do these settings~
Bevel Width~10
Bevel depth~100
Angle straight up and down
Color overlay checked
Color~#B770AA
Color opacity~100
highlight~#DDBBD8
shadow~#7C4473
Now add your watermark and anything else to make it yours.
Thanks for stopping by please come again soon.
Cocoa Cream
4:56 PM | Posted by
Marie's Palace Of Tuts |
Edit Post

Supplies~
Cocoa Cream Kit By Mystical Illusionz which you can get HERE
I used the art work of Jamie Kidd(formally of CILM now with CDO) which you can get a license HERE
Mask~22PSPMask.jpg(if this is yours email me your link)Font~Qwigley
Open miz11-cc-pp5.jpg copy and paste as a new image and apply your mask. Open miz-cc-doodle.pspimage copy and paste as a new image and resize to your liking. Open miz11-cc-pp2.jpg copy and paste as a new image. Open miz-cc-frame2.pspimage copy and paste as a new image and resize to your liking. I erased the second frame and erased all the access paper from miz11-cc-pp2. Open miz-cc-butterfly3.pspimage copy and paste as a new image and resize to your liking. Duplicate and mirror. Add drop shadows. These were my font settings.
Plugins Lokas Gel.
Do these settings~
Bevel Width~10
Bevel depth~100
Angle straight up and down
Color overlay checked
Color~#7D6A50
Color opacity~100
highlight~#D0C5B6
shadow~#40372A
Now add your watermark and anything else to make it yours.
Thanks for stopping by please come again soon.
Subscribe to:
Posts (Atom)
My Blinkies