Page Views
Contributors

- Marie's Palace Of Tuts
- Hi all my name is Marie. I haven't been doing tuts very long but I have been making tags for about 8 years now. I am disabled. I am a 26 year old. I still live at home with my mom. She is my world. I hope you like it here. If you have any questions or comments email me at PunkLilAngel778@yahoo.com
 Skater Girl
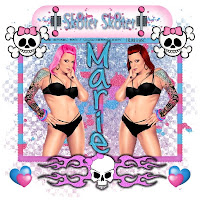
Supplies Needed~
Naughty N Bad Kit by Tamie (Addictive Pleasures) You can get HERE
I used the art work of Ismael Rac which you can get a license HERE
Mask~GrungeMask4byJenny which you can get HERE
Font Used~Kosal Says Hy
Plugins~
Eye Candy 3 (if you cant get 3 you can use 4 just a little different outcome)
Lokas Gel
Open a 600 x 600 new image with a white background. Open p7.png copy and paste as a new image. Go to masks and click from image and choose your mask. Open splatter.pspimage copy and paste as a new image. Open frame3.pspimage and paste as a new image resize by 70%. Open skateboard2.pspimage copy and paste as a new image and resize by 70%. Open Skull3.pspimage copy and paste as a new image resize by 70%. Go to layers and duplicate and go to image and mirror. Open Skull5.pspimage copy and paste as a new image. Go To Effects, Plugins, Eye Candy 3 With these Settings
Width~8
Opacity~100
Opacity dropoff~Thin
Color~Black
Draw everywhere~unchecked
Open hearts.pspimage copy and paste as a new image resize by 20%. Go to layers and duplicate and go to image and mirror. Now choose your tube you wanna add I choose Tattoos by Ismael Rac. Now add your name and use these settings
Go To effects Plugins Lokas Gel
Do these settings~
Bevel Width~10
Bevel depth~100
Angle straight up and down
Color overlay checked
Color~#4DC1E6
Color opacity~100
highlight~#E1F5FB
shadow~#1C91B2
Go To Effects, Plugins, Eye Candy 3 With these Settings
Width~8
Opacity~100
Opacity dropoff~Thin
Color~Black
Draw everywhere~unchecked
Now add your watermark and anything else to make it yours.
Thanks for stopping by please come again soon.
 Naughty N Bad
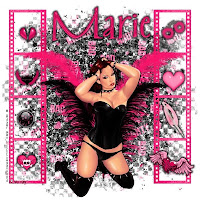
Supplies Needed~
Sk8ter Girl Kit by Tamie (Addictive Pleasures) You can get HERE
I used the art work of Ismael Rac which you can get a license HERE
Mask~GrungeMask4byJenny which you can get HERE
Font Used~Inkster
Plugins~
Eye Candy 3 (if you cant get 3 you can use 4 just a little different outcome)
Lokas Gel
Open a 600 x 600 new image with a white background. Open P6.png copy and paste as a new image. Now go to masks and click from image. Now open filmstrip.pspimage copy and paste as a new image resize by 85%. Go to image and rotate by 90. Go to layers and duplicate and then go to image and mirror. Open feathers.pspimage copy and paste as a new image. Open handcuffs2.pspimage copy and paste as a new image resize by 20%.Go To Effects, Plugins, Eye Candy 3 With these Settings
Width~8
Opacity~100
Opacity dropoff~Thin
Color~Black
Draw everywhere~unchecked
Open heartwithhorns.pspimage copy and paste as a new image resize by 20%. Repeat Eye Candy on this one. Open Leash.pspimage copy and paste as a new image resize by 20%. Repeat Eye Candy on this one. Open heart wings glass.pspimage copy and paste as a new image resize by 20%. Repeat Eye Candy on this one. Open Zipped Heart.pspimage copy and paste as a new image resize by 20%. Repeat Eye Candy on this one. Open heartwithwings.pspimage copy and paste as a new image resize by 20%. Repeat Eye Candy on this one. Open glassbrad.pspimage copy and paste as a new image resize by 20%. Repeat Eye Candy on this one. Open Cute Girly Skull.pspimage copy and paste as a new image resize by 30%. Repeat Eye Candy on this one. Choose a Tube of your choice. I used Black Corset by Ismael Rac. Go to effects, 3d effects, drop shadow. Use these settings
Vertical~2
Horizontal~2
Opacity~100
Blur~0
Color~Black
Now add your name and use these settings
Go To effects Plugins Lokas Gel
Do these settings~
Bevel Width~10
Bevel depth~100
Angle straight up and down
Color overlay checked
Color~#F61469
Color opacity~100
highlight~#FEACCD
shadow~#960640
Go To Effects, Plugins, Eye Candy 3 With these Settings
Width~8
Opacity~100
Opacity dropoff~Thin
Color~Black
Draw everywhere~unchecked
Now add your watermark and anything else to make it yours.
Thanks for stopping by please come again soon.
 Seasons in The Sun
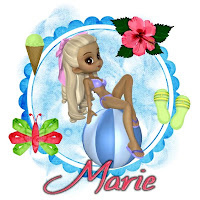
Supplies Needed~
Seasons In The Sun Scrap Kit by Designed By Stina You can get HERE
Mask Used Vix_Mask414.jpg which should be found HERE
Font Used~Certificate
Plugins~
Eye Candy 3 (if you cant get 3 you can use 4 just a little different outcome)Lokas Gel
Open a 500 x 500 new Image. Flood fill with white. Open DBS_Paper07.jpg copy and paste as a new image. Go to masks and click from image, choose the mask you decide to use. Open DBS_Frame02.pspimage copy and paste as a new image resize by 70%. Open DBS_BeachCookie01.pspimage copy and paste as a new image resize by 80%. Open DBS_WaffleCone02.pspimage copy and paste as a new image resize by 20%. Open DBS_Hibiscus03.pspimage copy and paste as a new image resize by 30%. Open DBS_FlipFlops02.pspimage copy and paste as a new image resize by 20%. Open DBS_FoldedButterfly04.pspimage copy and paste as a new image resize by 30%.
Now we are going to add our names with these settings.
Go To effects Plugins Lokas Gel
Do these settings~
Bevel Width~10
Bevel depth~100
Angle straight up and down
Color overlay checked
Color~#F95773
Color opacity~100
highlight~#FFD3DA
shadow~#C40A29
Go To Effects, Plugins, Eye Candy 3 With these Settings
Width~8
Opacity~100
Opacity dropoff~Thin
Color~Black
Draw everywhere~unchecked
Now add your watermark and anything else to make it yours.
Thanks for stopping by please come again soon.
 Sweet Summer
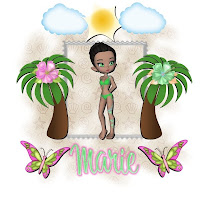
Supplies Needed~
Sweet Summer Scrap Kit by Rieka_Rafita You can get HERE
Mask Used gemsmask12.jpg (Not sure where I got this. If this is yours please email me and tell me where to link to)
Font Used~LHF Bounce Script
Plugins~
Eye Candy 3 (if you cant get 3 you can use 4 just a little different outcome)
Lokas Gel
Open a 500 x 500 new Image. Flood fill with white. Open RR_Paper2.jpg copy and paste as a new image. Go to Masks and click from image and pick your mask from the images. Open RR_Cocotier.pspimage copy and paste as a new image, resize by 45%. Go to effects, 3d effects, drop shadow. Use these settings
Vertical~2
Horizontal~2
Opacity~100
Blur~0
Color~black
Now go to layers and duplicate and go to image and mirror. Open RR_Flower1.pspimage copy and paste as a new image resize by 20%. Open RR_Flower2.pspimage copy and paste as a new image resize by 20%. Now what I did with these flowers is put them on the tree. Open RR_Cloud1.pspimage copy and paste as a new image resize by 40%. Go to layers and duplicate then go to image and mirror. Open RR_Sun1.pspimage copy and paste as a new image resize by 40%. Go to effects, 3d effects, drop shadow. Use these settings
Vertical~2
Horizontal~2
Opacity~100
Blur~0
Color~black
Open RR_Poser2.pspimage copy and paste as a new image resize by 45%. Go to effects, 3d effects, drop shadow. Use these settings
Vertical~2
Horizontal~2
Opacity~100
Blur~0
Color~black
Open RR_Butterfly1.pspimage copy and paste as a new image resize by 40%. Go to effects, 3d effects, drop shadow. Use these settings
Vertical~2
Horizontal~2
Opacity~100
Blur~0
Color~black
Go to layers duplicate and go to image and mirror.
Now we are going to add our names with these settings.
Go To effects Plugins Lokas Gel
Do these settings~
Bevel Width~10
Bevel depth~100
Angle straight up and down
Color overlay checked
Color~#A9F1B3
Color opacity~100
highlight~#E1FBE4
shadow~#22B834
Go To Effects, Plugins, Eye Candy 3 With these Settings
Width~8
Opacity~100
Opacity dropoff~Thin
Color~#FF57C6
Draw everywhere~unchecked
Now add your watermark and anything else to make it yours.
Thanks for stopping by please come again soon.
 Mausoleum
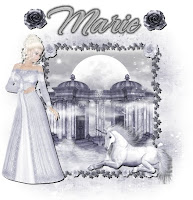
Mausoleum by Tamie (Addictive Pleasures) You can get HERE
Mask~yezmask015 (if this is yours please let me know where to link to)
Font Used~Caramel Candy
Plugins~
Eye Candy 3 (if you cant get 3 you can use 4 just a little different outcome)
Lokas Gel
Open a 600 x 600 new image with a white background. Open p5.pspimage copy and paste as a new image. Go to masks and click from image and find your mask and apply. Now open p3.pspimage copy and paste as a new image and resize by 50%. Now open Ivy Frame.pspimage copy and paste as a new image and resize by 50%. Now what I did here was take my eraser tool and erase the access off of the image with the buildings p3.pspimage. Now open Unicorn.pspimage copy and paste as a new image resize by 30%. Go to effects, 3d effects, drop shadow. Use these settings
Vertical~2
Horizontal~2
Opacity~100
Blur~0
Color~black
Now Open poser2.pspimage copy and paste as a new image and resize by 50%. Go to effects, 3d effects, drop shadow. Use these settings
Vertical~2
Horizontal~2
Opacity~100
Blur~0
Color~black
Now open flower3.pspimage copy and paste as a new image and resize by 20%. Go to effects, 3d effects, drop shadow. Use these settings
Vertical~2
Horizontal~2
Opacity~100
Blur~0
Color~black
You may want to crop your image a little and you do that with your crop tool.
Now we are going to add our names with these settings.
Go To effects Plugins Lokas Gel
Do these settings~
Bevel Width~10
Bevel depth~100
Angle straight up and down
Color overlay checked
Color~#C0C0C0
Color opacity~100
highlight~#E1E1E1
shadow~#808080
Go To Effects, Plugins, Eye Candy 3 With these Settings
Width~8
Opacity~100
Opacity dropoff~Thin
Color~Black
Draw everywhere~unchecked
Now add your watermark and anything else to make it yours.
Thanks for stopping by please come again soon.
 Thank You Angel
 Bad Girl
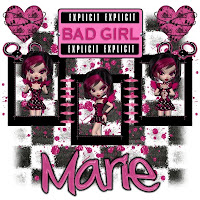
Supplies Needed~
Bad Girl Kit by Tamie (Addictive Pleasures) You can get HERE
Poser of your choice My 3 are by Roo which can be found HERE
Mask~UFMask43 (if this is yours please let me know where to link to)
Font Used~Kosal Says Hy
Plugins~
Eye Candy 3 (if you cant get 3 you can use 4 just a little different outcome)
Lokas Gel
Open a 600 x 600 new image with a white background. Open p4.png copy and paste as a new image. Go to masks and click from image and find your mask and apply. Now open glitter.pspimage. I went to layers and duplicated so i had 4 copies. I then flip and mirrored them so they are all over and just moved em around. Now open frame2.pspimage copy and paste as a new image, resize by 65%. Open handcuffs.pspimage copy and paste as a new image resize by 20%. Go to layers and duplicate. Go to image and mirror. Choose your posers or tubes. and resize to your liking. Now add your name and use these settings
Go To effects Plugins Lokas Gel
Do these settings~
Bevel Width~10
Bevel depth~100
Angle straight up and down
Color overlay checked
Color~#D55392
Color opacity~100
highlight~#EFBBD6
shadow~#A52969
Go To Effects, Plugins, Eye Candy 3 With these Settings
Width~8
Opacity~100
Opacity dropoff~Medium
Color~Black
Draw everywhere~unchecked
Now add your watermark and anything else to make it yours.
Thanks for stopping by please come again soon.
 Princess Tales
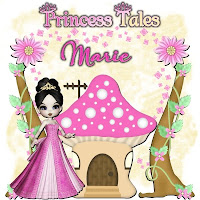
Supplies Needed~
Princess Tales Scrap Kit by Rieka_Rafita You can get HERE
Font Used~Boundless_Bold
Plugins~
Eye Candy 3 (if you cant get 3 you can use 4 just a little different outcome)
Lokas Gel
Start by Opening a new image 600 x 600 with a white background. Now open RR_Paper13.jpg copy and paste as a new image. Now go to mask, from image, in the drop down menu choose your mask. Now on the layer palette hide your background layer. Now highlight your mask layer and duplicate it twice. Now go to layers and merge visable. Now unhide the background layer. Now open RR_GemScatter.pspimage copy and paste as a new image. Now open RR_MushroomHouse.pspimage copy and paste as a new layer resize by 70%. Go to effects, 3d effects, drop shadow with these settings
Vertical~2
Horizontal~2
Opacity~100
Blur~0
Color~Black
Now Open RR_Tree.pspimage copy and paste as a new image, resize by 85%. Go to effects, 3d effects, drop shadow with these settings
Vertical~2
Horizontal~2
Opacity~100
Blur~0
Color~Black
Go to layers and duplicate. Go to image and mirror. Now Open RR_Flower6.pspimage copy and paste as a new image resize by 20%.Go to effects, 3d effects, drop shadow with these settings
Vertical~2
Horizontal~2
Opacity~100
Blur~0
Color~Black
Now open RR_Wordart2.pspimage copy and paste as a new image. Go To Effects, Plugins, Eye Candy 3 With these Settings
Width~8
Opacity~100
Opacity dropoff~Thin
Color~Black
Draw everywhere~unchecked
Now Open RR_Poser2.pspimage copy and paste as a new image. Resize by 45%. Go To Effects, Plugins, Eye Candy 3 With these Settings
Width~8
Opacity~100
Opacity dropoff~Thin
Color~Black
Draw everywhere~unchecked
Now we are going to add our names with these settings.
Go To effects Plugins Lokas Gel
Do these settings~
Bevel Width~10
Bevel depth~100
Angle straight up and down
Color overlay checked
Color~#FF57C6
Color opacity~100
highlight~#FFDBF3
shadow~#C50784
Go To Effects, Plugins, Eye Candy 3 With these Settings
Width~8
Opacity~100
Opacity dropoff~Thin
Color~Black
Draw everywhere~unchecked
Now add your watermark and anything else to make it yours.
Thanks for stopping by please come again soon.
 Girls Night
Supplies Needed~
Scrap Kit By Bea Creations Called Girls Night which you can get here
Mask~GemsMask 12 (if this is yours please let me know where to link back)
Font~Tisdall Script Expert
Plugins~
Eye Candy 3 (if you cant get 3 you can use 4 just a little different outcome)
Lokas Gel
Open a 600 x 600 with a white background. Open Paper p8_bc_girlsnight.png copy and paste as a new image. Go up to Mask and from image and choose your mask and apply it. Open frame3_bc_girlsnight.pspimage copy and paste as a new image and resize it by 120%. Open flowerstem2_bc_girlsnight.pspimage copy and paste as a new image, resize by 70%. Go To Effects, Plugins, Eye Candy 3 With these Settings
Width~8
Opacity~100
Opacity dropoff~Thin
Color~#E37F90
Draw everywhere~unchecked
Go to layers duplicate, go to image and mirror. Open flower16_bc_girlsnight.pspimage copy and paste resize by 30%. Move it down so it cover the bottom of the steam on the other flowers. Go to layers and duplicate. Open shoe_bc_girlsnight.pspimage copy and paste, resize by 30%. Go To Effects, Plugins, Eye Candy 3 With these Settings
Width~8
Opacity~100
Opacity dropoff~Thin
Color~#E37F90
Draw everywhere~unchecked
Open bag_bc_girlsnight.pspimage copy and paste, resize by 30%. Go To Effects, Plugins, Eye Candy 3 With these Settings
Width~8
Opacity~100
Opacity dropoff~Thin
Color~#E37F90
Draw everywhere~unchecked
Open lipstick2_bc_girlsnight.pspimage copy and paste, resize by 50%. Go To Effects, Plugins, Eye Candy 3 With these Settings
Width~8
Opacity~100
Opacity dropoff~Thin
Color~#E37F90
Draw everywhere~unchecked
Open nailpolish3_bc_girlsnight.pspimage copy and paste, resize by 50%. Go To Effects, Plugins, Eye Candy 3 With these Settings
Width~8
Opacity~100
Opacity dropoff~Thin
Color~#E37F90
Draw everywhere~unchecked
Open poser2_bc_girlsnight.pspimage Copy and Paste as a new image. Go to effects, 3d effects, drop shadow with these settings
Vertical~2
Horizontal~2
Opacity~100
Blur~0
Color~Black
Now we are going to add your name. when you have added your name use these settings on lokas and eye candy
Go To effects Plugins Lokas Gel
Do these settings~
Bevel Width~10
Bevel depth~100
Angle straight up and down
Color overlay checked
Color~#CD364F
Color opacity~100
highlight~#F6D8DD
shadow~#802232
Go To Effects, Plugins, Eye Candy 3 With these Settings
Width~8
Opacity~100
Opacity dropoff~Medium
Color~Black
Draw everywhere~unchecked
Now add your watermark and whatever else to make it yours.
Enjoy and come back soon
 Honey Bee
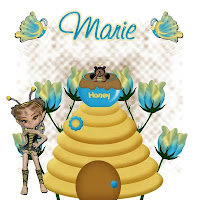
You Will need
Plugins~
Eye Candy 3
Lokas Gel
Scrap kit By Wicked Princess Called Honey Bee Mine which you can get here
Poser by House of Poser which can be found HERE
Mask~Grunge Mask4_Rose you can find here
Font Used~LaramiePro
Open a new image 600 x 600 with a White Background. Open WP_HBM_PP13.jpg copy and paste as a new image. Now lets apply the mask. Go to mask then from image and in the drop down menu choose the mask. Open WP_HBM_BEEHIVE.pspimage copy and paste as a new image, resize by 70%. Open WP_HBM_HONEYJARBEEBEAR.pspimage copy and paste as a new image, resize by 30%. Open WP_HBM_BAUGANILLA.pspimage copy and paste as a new image, make sure the roses are under the honey bee house, resize by 80%. Go to layers and duplicate, now go to image and mirror. Now open poser of your choice i choose HOP_NymphDream Bumble Bee 4 By House of Poser. Copy and paste as a new image and resize to your liking. Open WP_HBM_JEWELDBUTTERLY.pspimage copy and paste a new image, resize by 30%. Go to layers duplicate and goto image and mirror. These will be on each side of your name. Now add you name with your choice of fonts. Go To effects Plugins Lokas Gel
Do these settings~
Bevel Width~10
Bevel depth~100
Angle straight up and down
Color overlay checked
Color~#25A0CF
Color opacity~100
highlight~#D7F2FB
shadow~#155F77
Go To Effects, Plugins, Eye Candy 3 With these Settings
Width~8
Opacity~100
Opacity dropoff~Medium
Color~#F1E0A5
Draw everywhere~unchecked
Now add your watermark and anything else to make it yours.
Thanks for stopping by please come again soon.
 Lil Miss USA
Supplies Needed~
Lil Miss USA Scrap Kit by Bello Scarto You can get HERE
Poser was in the scrap kit by MEDIEVIL CREATIONS
Font Used~Angelina
Mask Used yezmask013.jpg (Not sure where I got this. If this is yours please email me and tell me where to link to)
Plugins~
Eye Candy 3 (if you cant get 3 you can use 4 just a little different outcome)
Lokas Gel
Open a New Image. I like my images about 500 x 500, White background.
Open bs-lilmissusapaper20.jpg copy and paste as a new image, make sure your mask is at the bottom of the screen. Go to Masks, from image, choose your mask name, Click ok. Open bs-lilmissusa-element36.pspimage copy and paste as a new image, resize by 75%. Open bs-lilmissusa-element50.pspimage copy and paste as a new image, resize by 65%. Go to effects, 3d effects, drop shadow. Use these settings
Vertical~2
Horizontal~2
Opacity~100
Blur~0
Color~Black
Open bs-lilmissusa-element45.pspimage copy and paste as a new image. Resize by 30%. Open bs-lilmissusa3-medi_patriot1.pspimage copy and paste as a new image, resize by 40%. Go to effects, 3d effects, drop shadow. Use these settings
Vertical~2
Horizontal~2
Opacity~100
Blur~0
Color~Black
Open bs-lilmissusa-element21.pspimage copy and paste as a new image, Resize by 20%. Go to effects, 3d effects, drop shadow. Use these settings
Vertical~2
Horizontal~2
Opacity~100
Blur~0
Color~Black
Go to layers and duplicate. Then go to image and mirror and move to the bottom right corner. Now add your name with color of your choice I will be using Blue.
Go To effects Plugins Lokas Gel
Do these settings~
Bevel Width~10
Bevel depth~100
Angle straight up and down
Color overlay checked
Color~#0000FF
Color opacity~100
highlight~#D3D4FF
shadow~#02058E
Go To Effects, Plugins, Eye Candy 3 With these Settings
Width~8
Opacity~100
Opacity dropoff~Medium
Color~Black
Draw everywhere~unchecked
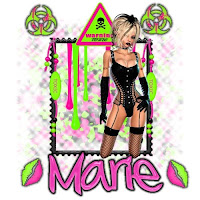
 Toxic Babe
Supplies Needed~
Toxic Scrap Kit by Tamie (Addictive Pleasures) You can get HERE
Frame Tube of your choice
Poser of your choice Mine is by House of Poser which can be found HERE
Mask~Grunge Mask4_Rose you can find here
Font Used~Kosal Says Hy
Plugins~
Eye Candy 3 (if you cant get 3 you can use 4 just a little different outcome)
Lokas Gel
Open a new image with a white background. Open P12.pspimage copy and paste as new image. Open your mask and have it at the bottom. Now go to masks, new, from image. Copy and paste your choice of frame as a new image. Resize to your liking. Open decor2.pspimage copy and paste as a new image. Resize by 20%. Go To Effects, Plugins, Eye Candy 3 With these Settings
Width~8
Opacity~100
Opacity dropoff~Thin
Color~Black
Draw everywhere~unchecked
Now Duplicate that image by going up to layers then hit duplicate. Now go to image and mirror. Now Open sign.pspimage copy and paste as new image. Resize by 30%. Now Open beads.pspimage copy and paste as new image. Resize by 30%. Now Open lips.pspimage copy and paste as new image, resize by 30%, image rotate free style by 60. Go To Effects, Plugins, Eye Candy 3 With these Settings
Width~8
Opacity~100
Opacity dropoff~Thin
Color~Black
Draw everywhere~unchecked
Go to layers, duplicate. The to image and mirror. Now Open your poser tube and copy and paste as new image. Resize to your liking. Now to add your name. I did mine in hot pink and used these settings. Go To effects Plugins Lokas Gel
Do these settings~
Bevel Width~10
Bevel depth~100
Angle straight up and down
Color overlay checked
Color~#FF57C6
Color opacity~100
highlight~#FFDBF3
shadow~#C50784
Go To Effects, Plugins, Eye Candy 3 With these Settings
Width~8
Opacity~100
Opacity dropoff~Medium
Color~Black
Draw everywhere~unchecked
Now add your watermark and whatever else to make it yours.
Enjoy and come back soon
 Punk Babe
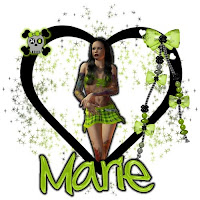
Punk Babe Scrap Kit by Rieka_Rafita You can get HERE
Font Used~Kosal Says Hy
Plugins~
Eye Candy 3 (if you cant get 3 you can use 4 just a little different outcome)
Lokas Gel
Open a 500 x 500 new Image. Flood fill with white.
Go to Layers, add new raster layer. Open RR_Sparkle2.pspimage from your scrap kit. Copy & paste as new image. Resize by 50%. Duplicate, Image, Mirror. Duplicate each one of those and flip each one. Now open RR_Frames1.pspimage Copy and paste as new image. Resize by 50%. Open RR_Poser2.pspimage copy and paste as a new image. Resize by 50%. now what i did here is took my eraser tool and erase the feet so it fits in the heart frame. Go To Effects, Plugins, Eye Candy 3 With these Settings
Width~8
Opacity~100
Opacity dropoff~Medium
Color~Black
Draw everywhere~unchecked
Now Open RR_Beadedrope.pspimage Copy and paste as new image. Resize by 50%. move it to the right hand side. Now open RR_Skull4.pspimage copy and paste as new image. Resize by 15%. Go To Effects, Plugins, Eye Candy 3 With these Settings
Width~8
Opacity~100
Opacity dropoff~Thin
Color~#9FD211
Draw everywhere~unchecked
Now open your font and we are going to add our names. Go To effects Plugins Lokas Gel
Do these settings~
Bevel Width~10
Bevel depth~100
Angle straight up and down
Color overlay checked
Color~#9FD211
Color opacity~100
highlight~#F2FDD5
shadow~#5B7A08
Go To Effects, Plugins, Eye Candy 3 With these Settings
Width~8
Opacity~100
Opacity dropoff~Medium
Color~Black
Draw everywhere~unchecked
Now add your watermarks and whatever else to make it yours.


