Page Views
Contributors

- Marie's Palace Of Tuts
- Hi all my name is Marie. I haven't been doing tuts very long but I have been making tags for about 8 years now. I am disabled. I am a 26 year old. I still live at home with my mom. She is my world. I hope you like it here. If you have any questions or comments email me at PunkLilAngel778@yahoo.com
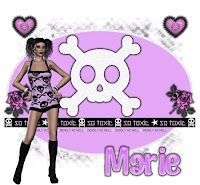
 So Toxic

Supplies Needed~
Toxic Mess Scrap Kit by Roo You can get HERE
Scrap Template by Toxic Designs which you can get here ( its temp 115)
Mask~Grunge Mask4_Rose you can find here
Font Used~Bochalema Bold
Plugins~
Eye Candy 3 (if you cant get 3 you can use 4 just a little different outcome)
Lokas Gel
Ok Lets start by opening the template. Hit Shift & D so you have 2 now. Close the original. On the layer palette delete the credits. It is your choice if you want to leave the wording or not. On the layer palette highlight the Large Skull. Go To Effects, Plugins, Eye Candy 3 With these Settings
Width~8
Opacity~100
Opacity dropoff~Thin
Color~Black
Draw everywhere~unchecked
Now go to layers add a new raster layer and make sure it is right above your background layer. Open ToxicMessPapers_SBR17.jpg from your scrap kit. Copy & paste as new selection. Go to Selections and Select none. Now open your mask and minimize it . On the tag go up to mask and from image. Choose the mask and click ok. Now go to your scrap kit and open ToxicMessElements_SBR39.pspimage you can place it where ever you think looks best. I resized mine down by 25% and added glow with these settings. Go To Effects, Plugins, Eye Candy 3 With these Settings
Width~8
Opacity~100
Opacity dropoff~Thin
Color~Black
Draw everywhere~unchecked
Also Duplicated & clicked on image and mirrored so I had one on each side. Now open ToxicMessElements_SBR21.pspimage. Copy & Paste. I resized this by 35% and went to effects, 3D effects, Drop shadow and did these settings.
Vertical~2
Horizontal~2
Opacity~100
Blur~0
Color~Black
Now Open ToxicMessElements_SBR02.pspimage, copy and paste. Resized by 20%. Go To Effects, Plugins, Eye Candy 3 With these Settings
Width~8
Opacity~100
Opacity dropoff~Thin
Color~Black
Draw everywhere~unchecked
Also Duplicated & clicked on image and mirrored so I had one on each side. Now open your font and add your name. Go To effects Plugins Lokas Gel
Do these settings~
Bevel Width~10
Bevel depth~100
Angle straight up and down
Color overlay checked
Color~#E4A7F5
Color opacity~100
highlight~#F7E4FC
shadow~#BC2CE6
Go To Effects, Plugins, Eye Candy 3 With these Settings
Width~8
Opacity~100
Opacity dropoff~Thin
Color~Black
Draw everywhere~unchecked
Now add your watermark and whatever else to make it yours and your done. Thanks for coming by.
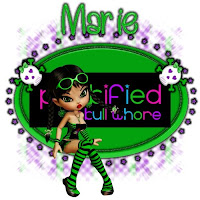
 Punkified

Plugins~
Eye Candy 3
Lokas Gel
Scrap kit By Wicked Princess Called Acid Rock which you can get here
Scrap Template by Toxic Designs which you can get here ( its temp 105)
Mask~Grunge Mask4_Rose you can find here
Font Used~Bochalema Regular
Open you're templete hit Shift and D to make a second copy and close the first one
First delete the credits off....I also removed the skulls
Highlight the stars and goto effects plugins ~Eye Candy 3~Glow and use these settings
Width~8
Opacity~100
opacity Dropoff~Medium
Color~Black
Same with the dotted circle
Width~8
Opacity~100
opacity dropoff~Thin
Color~Black
HighLight Oval~ Go To effects Plugins Lokas Gel
Do these settings~
Bevel Width~10
Bevel depth~100
Angle straight up and down
Color overlay checked
Color~#FF57C6
Color opacity~100
highlight~#FFDDF3
shadow~#F800A4
Now goto layers add a new raster layer name it Mask
Make sure its right above your background layer
now take WP_AR_PP7 copy and paste as a new selection then goto selections and select none
Make sure you have your mask open and goto mask up at the top click from image
and find the mask in the drop down menu..resize to 110
Now open WP_AR_Skull1 copy and paste into the image we are working with
resize down 30% now rotate free hand and 60 as the number
Duplicate and mirror so you have one for each side of the wording
now goto effects~plugins~Eye candy 3~glow
do these settings
Width~8
Opacity~100
opacity dropoff~Thin
Color~#BF00FF (use that as the color)
Do that one each of the skulls
Now open WP_AR_Doll3 copy and paste into image resize by 50%
now goto effects~plugins~Eye candy 3~glow
do these settings
Width~8
Opacity~100
opacity dropoff~Thin
Color~Black
Now Open You're font and do whatever text you would like wherever you want it
now Go To effects Plugins Lokas Gel
Do these settings~
Bevel Width~10
Bevel depth~100
Angle straight up and down
Color overlay checked
Color~this is gonna be the color that you choose the font to be
Color opacity~100
highlight~this will be the color you choose but lighter
shadow~this will be the color you choose but darker
now goto effects~plugins~Eye candy 3~glow
do these settings
Width~8
Opacity~100
opacity dropoff~Thin
Color~Black
Add your watermarks and if you wanna add animations...just give it you're style and you're done
Thank You for stopping by
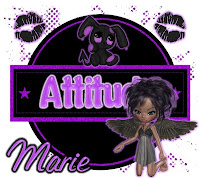
 Purple Attitude

Scrap Kit By Bea Creations which you can get here
Missy Templates 264 which you can get here
Poser By Roo~DigiDivaz
2 Fonts~
Lesline
Bochalema Bold
Plugins~
Eye Candy 3 (if you cant get 3 you can use 4 just a little different outcome)
Ok Lets get started....
Open your missy template 264 and hit shift & D and X out of the original copy. Now delete the credits. Now on your layer palette highlight stars and go up to the colors up top and colorize. do these settings
Hue~205
Saturation~255
I need you to do the same with the same settings to the following
Dotted Rectangle
Glittered Rectangle
Glittered Circle
Remember use colorize and these settings
Hue~205
Saturation~255
Now go to your scrap kit and open deco03_bc_purpleandblack copy and paste as a new layer on the tag we are working on. Make sure it is right above your background layer. Now move it down to the lower right corner. Duplicate. Go up to Image and click flip. Take that one and move to the upper left corner. Now open kiss01_bc_purpleandblack copy and paste as new layer make sure its all the way up top on the layer palette. Now move it to the top right corner. Go to effects,plugins,Eye Candy 3,Glow with these settings,
Width~8
Opacity~100
Opacity dropoff~Thin
Color~#CE6AF8
Draw everywhere~unchecked
Now go to layer and Duplicate. Now go to image and mirror now it should be on the top left corner so you should have 2 now. Now open bunny01_bc_purpleandblack
copy and paste as new layer on the tag we are working on. Effects, plugins, eye candy 3, glow with these settings
Width~8
Opacity~100
Opacity dropoff~Thin
Color~#CE6AF8
Draw everywhere~unchecked
Put the bunny sitting on the glittered box. Now we will be using bochalema bold font now. We will be using this color #CE6AF8 for our font. First go to layers and add a new raster layer, name it font~wordart. Now on that layer, Type the word Attitude. now effects, plugins, lokas, gel, these settings
Bevel width~10
Bevel depth~100
Color overlay~checked
Color~#CE6AF8
Color opacity~100
Highlight~#EABBFD
Shadow~#940FCB
Highlight opacity~50
shadow opacity~50
Now Open the poser copy and paste into the tag we are working on. Resize by 30. Effects, plugins, eye candy 3, glow, with these settings
Width~8
Opacity~100
Opacity dropoff~Thin
Color~#D182FA
Draw everywhere~unchecked
Now we are going to add our names to the tag. First add a new raster layer call it name. Now add your name with this color #CE6AF8. Effects, plugins, lokas, gel, with these settings
Bevel width~10
Bevel depth~100
Color overlay~checked
Color~#CE6AF8
Color opacity~100
Highlight~#EABBFD
Shadow~#940FCB
Highlight opacity~50
shadow opacity~50
Effects, plugins, eye candy 3, glow with these settings
Width~8
Opacity~100
Opacity dropoff~Fat
Color~Black
Draw everywhere~unchecked
Selections and select none. Now add your watermarks, and anything else you want to do to make it yours.
Thanks for stopping by again