Page Views
Contributors

- Marie's Palace Of Tuts
- Hi all my name is Marie. I haven't been doing tuts very long but I have been making tags for about 8 years now. I am disabled. I am a 26 year old. I still live at home with my mom. She is my world. I hope you like it here. If you have any questions or comments email me at PunkLilAngel778@yahoo.com
Sunday, August 29, 2010
 American Sweetheart
3:07 PM | Posted by
Marie's Palace Of Tuts |
 Edit Post
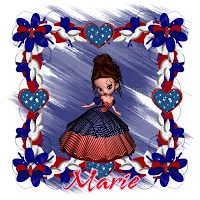
Supplies Needed~
American Sweetheart Scrap Kit by Bello Scarto You can get HERE
Poser was in the scrap kit by MEDIEVIL CREATIONS
Font Used~AridITC
Mask Used Fdl_171.jpg (Not sure where I got this. If this is yours please email me and tell me where to link to)
Plugins~
Eye Candy 3 (if you cant get 3 you can use 4 just a little different outcome)
Lokas Gel
Open a 600 x 600 new image with a white background.
Open bs-americansweetheart-paper7.jpg copy and paste as a new image. Go to Masks, from image, choose your mask name, Click ok. Open bs-americansweetheart-element32.pspimage copy and paste as a new image, Resize by 55%. Go to layers duplicate x 3 and place them where you like.Open bs-americansweetheart-element23.pspimage copy and paste as a new image, resize by 30%. Go to layers duplicate x 3 and place them where you like. Now add your name with color of your choice I will be using Blue.
Go To effects Plugins Lokas Gel
Do these settings~
Bevel Width~10
Bevel depth~100
Angle straight up and down
Color overlay checked
Color~#FF0000
Color opacity~100
highlight~#FFC1C4
shadow~#A00404
Go To Effects, Plugins, Eye Candy 3 With these Settings
Width~8
Opacity~100
Opacity dropoff~Medium
Color~#CFD0FF
Draw everywhere~unchecked
Now add your watermark and anything else to make it yours.
Thanks for stopping by please come again soon.
Wednesday, August 25, 2010
 Roo Is Looking for CT Members
9:13 PM | Posted by
Marie's Palace Of Tuts |
 Edit Post
Roo is totally awsome and makes kick butt stuff Join up and you wont be disappointed!!!!
 Beware of Bitch
6:27 PM | Posted by
Marie's Palace Of Tuts |
 Edit Post

Supplies Needed~
Bitch Collab by Missy & Tammy You can get HERE
I used the art work of Ismael Rac which you can get a license HERE
Font Used~International Palms
Open a 600 x 200 new image with a Black background. Open TS_Bitch Glitter 3.pspimage copy and paste as a new image and duplicate and mirror. Open TS_Bitch Flowers 10.pspimage copy and paste as a new image and resize by 10%. Open TS_Bitch Flowers 9.pspimage copy and paste as a new image and resize by 10%. Open TS_Bitch Sticker 2.pspimage copy and paste as a new image and resize by 20%. Open TS_Bitch Sticker 1.pspimage copy and paste as a new image and resize by 20%. Open TS_Bitch Nautical Star 3.pspimage copy and paste as a new image and resize by 50%.Go To Effects, Plugins, Eye Candy 3~Glow With these Settings
Width~8
Opacity~100
Opacity dropoff~thin
Color~white
Draw everywhere~unchecked
Now we are going to add our name with these settings
Go To effects Plugins Lokas Gel
Do these settings~
Bevel Width~10
Bevel depth~100
Angle straight up and down
Color overlay checked
Color~#5BFE31
Color opacity~100
highlight~#C5FFB3
shadow~#2AB101
Go To Effects, Plugins, Eye Candy 3~Glow With these Settings
Width~8
Opacity~100
Opacity dropoff~medium
Color~#FEAECC
Draw everywhere~unchecked
Now add your watermark and anything else to make it yours.
Thanks for stopping by please come again soon.
 Biatchitude
6:25 PM | Posted by
Marie's Palace Of Tuts |
 Edit Post
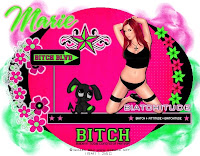
Supplies Needed~
Bitch Collab by Missy & Tammy You can get HERE
I used the art work of Ismael Rac which you can get a license HERE
Scrap Templete by Missy you can get HERE
Font Used~A&S Snapper Script
Open a 600 x 600 new image with a white background. Open the scrap Templete and hit shift and D and close out the oringial. Highlight circle on your layer palette and copy and paste TS_Bitch Paper 11.jpg into the circle. Open TS_Bitch Flowers 10.pspimage copy and paste as a new image and resize by 10%. Open TS_Bitch Flowers 9.pspimage copy and paste as a new image and resize by 10%. Open TS_Bitch Nautical Star 3.pspimage copy and paste as a new image and resize by 30%. Go To Effects, Plugins, Eye Candy 3~Glow With these Settings Open TS_Bitch Flowers 2.pspimage copy and paste as a new image and resize by 30%. Go to Layers duplicate and go to image and flip. Go To Effects, Plugins, Eye Candy 3~Glow With these Settings
Width~8
Opacity~100
Opacity dropoff~thin
Color~white
Draw everywhere~unchecked
Width~8
Opacity~100
Opacity dropoff~thin
Color~white
Draw everywhere~unchecked
Open Bitch_Sign3.pspimage copy and paste as a new image and resize by 30%. Open TS_Bitch Emo Bunny 1.pspimage copy and paste as a new image and resize by 30%. Now add your name and use these settings
Go To effects Plugins Lokas Gel
Do these settings~
Bevel Width~10
Bevel depth~100
Angle straight up and down
Color overlay checked
Color~#5BFE31
Color opacity~100
highlight~#C5FFB3
shadow~#2AB101
Go To Effects, Plugins, Eye Candy 3 With these Settings
Width~8
Opacity~100
Opacity dropoff~Thin
Color~#FEAECC
Draw everywhere~unchecked
Now add your watermark and anything else to make it yours.
Thanks for stopping by please come again soon.
Tuesday, August 24, 2010
 MilkShake
12:10 PM | Posted by
Marie's Palace Of Tuts |
 Edit Post

Supplies Needed~
MilkShake Kit by Tamie (Addictive Pleasures) You can get HERE
I used the art work of Ismael Rac which you can get a license HERE
Mask~Vix_Mask365.jpg (Not sure where I got this. If this is yours please email me and tell me where to link to)
Font Used~Candy Script
Open a 600 x 600 new image with a white background. Open p1.png copy and paste as a new image. Go to masks and click from image and choose your mask. Open Glitter.pspimage copy and paste as a new image. Open stampframe2.pspimage copy and paste as a new image and resize by 85%. Open beads3.pspimage copy and paste as a new image and resize by 50%. Go to layers duplicate and image and mirror. Open glassbrad.pspimage copy and paste as a new image and resize by 20%. Go to layers duplicate. Open cherries.pspimage copy and paste as a new image and resize by 50%. Open lips.pspimage copy and paste as a new image and resize by 50%. Open milkshake.pspimage copy and paste as a new image and resize by 30%. Now we are going to add our name with these settings
Go To effects Plugins Lokas Gel
Do these settings~
Bevel Width~10
Bevel depth~100
Angle straight up and down
Color overlay checked
Color~#FF0000
Color opacity~100
highlight~#FFBBBB
shadow~#890303
Go To Effects, Plugins, Eye Candy 3~Glow With these Settings
Width~8
Opacity~100
Opacity dropoff~medium
Color~Black
Draw everywhere~unchecked
Now add your watermark and anything else to make it yours.
Thanks for stopping by please come again soon.
Thursday, August 19, 2010
 Sexy Nurse
12:39 PM | Posted by
Marie's Palace Of Tuts |
 Edit Post
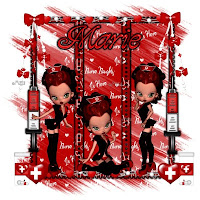
Supplies Needed~
Poser was in the scrap kit by MEDIEVIL CREATIONS
Mask~Fdl_171.jpg (Not sure where I got this. If this is yours please email me and tell me where to link to)
Font Used~Aja
Open a 600 x 600 new image with a white background. Open p8.png copy and paste as a new image. Go to masks and apply your mask. Open frame2.pspimage copy and paste as a new image and resize by 75%. Go to effects, 3d effects, drop shadow. Use these settings
Vertical~2
Horizontal~ -2
Opacity~100
Blur~0
Color~Black
Open decor.pspimage copy and paste as a new image and resize by 50%. Go to layers and duplicate. Open beads.pspimage copy and paste as a new image and resize by 40%. Go to layers and duplicate and go to image and mirror. Open Needle.pspimage copy and paste as a new image and go to image and rotate by 180. Resize by 50%. Go to layers and duplicate and go to image and mirror. Open heart3.pspimage copy and paste as a new image and resize by 20%. Go to layers and duplicate and go to image and mirror. Open MedicineBottle.pspimage copy and paste as a new image and resize by 30%. Go to layers and duplicate and go to image and mirror. Now we are going to add our name with these settings
Go To effects Plugins Lokas Gel
Do these settings~
Bevel Width~10
Bevel depth~100
Angle straight up and down
Color overlay checked
Color~#FF0000
Color opacity~100
highlight~#FFCFCF
shadow~#6D0101
Go To Effects, Plugins, Eye Candy 3~Glow With these Settings
Width~8
Opacity~100
Opacity dropoff~medium
Color~Black
Draw everywhere~unchecked
Now add your watermark and anything else to make it yours.
Thanks for stopping by please come again soon.
Saturday, August 14, 2010
 STFU
STFU
3:17 PM | Posted by
Marie's Palace Of Tuts |
 Edit Post
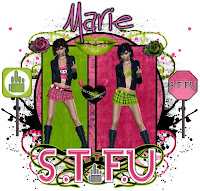
Supplies Needed~
STFU Scrap Kit by Roo You can get HERE
Scrap Templete by Roo Can be downloaded HERE
Font Used~Kloegirl new york ITC STD
Plugins~
Eye Candy 3 (if you cant get 3 you can you 4 just a little different outcome)
Lokas Gel
Open the scrap template hit shift & d to copy it now X out of the orinigal one. Highlight the mask layer on your layer palette and take your magic wand and click on. Open STFU_P_TS_SBR13.jpg copy and paste into selection. Highlight bottom accent click on it with your magic wand. Open STFU_P_TS_SBR05.jpg copy and paste into selection. Highlight top accent click on it with your magic wand. Open STFU_P_TS_SBR08.jpg copy and paste into selection. Highlight large circle click on it with your magic wand. Open STFU_P_TS_SBR12.jpg copy and paste into selection. Highlight Right Rectangle click on it with your magic wand. Open STFU_P_TS_SBR10.jpg copy and paste into selection. Highlight Left Rectangle click on it with your magic wand. Open STFU_P_TS_SBR01.jpg copy and paste into selection. I took out the oval and wordart and replaced it with STFU_E_TS_SBR41.pspimage and I resized it by 60%. Open STFU_E_TS_SBR12.pspimage copy and paste as a new image and resize by 30%. Open STFU_E_TS_SBR01.pspimage copy and paste as a new image and resize by 30%. Open STFU_E_TS_SBR44.pspimage copy and paste as a new image and resize by 30%. Open STFU_E_TS_SBR06.pspimage copy and paste as a new image move it so it is right above your mask layer. Go to layers duplicate go to image and mirror. Open STFU_E_TS_SBR07.pspimage copy and paste as a new image move it so it is right above your mask layer. Go to layers duplicate go to image and mirror. Open STFU_E_TS_SBR15.pspimage copy and paste as a new image and resize by 15%. Open STFU_E_TS_SBR48.pspimage copy and paste as a new image and resize by 15%. Open STFU_E_TS_SBR47.pspimage copy and paste as a new image and resize by 15%. Open STFU_E_TS_SBR04.pspimage copy and paste as a new image and resize by 60%. Open STFU_E_TS_SBR03.pspimage copy and paste as a new image and resize by 60%. Now we are going to add our name with these settings
Go To effects Plugins Lokas Gel
Do these settings~
Bevel Width~10
Bevel depth~100
Angle straight up and down
Color overlay checked
Color~#FF57C6
Color opacity~100
highlight~#FFDBF3
shadow~#C50784
Go To Effects, Plugins, Eye Candy 3 With these Settings
Width~8
Opacity~100
Opacity dropoff~Medium
Color~Black
Draw everywhere~unchecked
Now add your watermark and anything else to make it yours.
Thanks for stopping by please come again soon.
Friday, August 13, 2010
 Sexy Devil
5:44 PM | Posted by
Marie's Palace Of Tuts |
 Edit Post

Supplies Needed~
I used the art work of Ismael Rac which you can get a license HERE
Mask~188MaskkelsWWA.jpg (Not sure where I got this. If this is yours please email me and tell me where to link to)
Font Used~Bochalema Bold
Open a 600 x 600 new image with a white background. Open p6.png copy and paste as a new image. Go to masks and apply your mask. Open frame.pspimage copy and paste as a new image. Open decor3.pspimage copy and paste as a new image resize by 60%. Now add glow with these settings Go To Effects, Plugins, Eye Candy 3~Glow With these Settings
Width~8
Opacity~100
Opacity dropoff~thin
Color~white
Draw everywhere~unchecked
Open wingedheart2.pspimage copy and paste as a new image resize by 20%. Open flames.pspimage copy and paste as a new image resize by 40%. Go To Effects, Plugins, Eye Candy 3~Glow With these Settings
Width~8
Opacity~100
Opacity dropoff~thin
Color~white
Draw everywhere~unchecked
Open banner.pspimage copy and paste as a new image resize by 80%. Open tag3.pspimage copy and paste as a new image. Open teddy2.pspimage copy and paste as a new image resize by 40%. Open decor5.pspimage copy and paste as a new image resize by 20%. Open banner.pspimage copy and paste as a new image resize by 70%. Now we are going to add name. and I used these settings
Go to Effects..3D effects...Inner bevel
Bevel~Triangle
Width~8
Smoothness~0
Depth~20
Ambience~0
Shininess~0
Color~White
Angle~315
Intensity~50
Elevation~30
Go to effects, 3d effects, drop shadow. Use these settings
Vertical~2
Horizontal~ -2
Opacity~100
Blur~0
Color~Black
Now add your watermark and anything else to make it yours.
Thanks for stopping by please come again soon.
Thursday, August 12, 2010
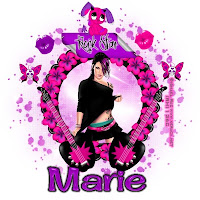
 Rock Star
12:22 PM | Posted by
Marie's Palace Of Tuts |
 Edit Post
Supplies Needed~
Rock Star Scrap Kit by Rieka_Rafita You can get HERE
I used the art work of Ismael Rac which you can get a license HERE
Mask Used SOE_Mask9_ByRachel09.jpg (Not sure where I got this. If this is yours please email me and tell me where to link to)
Font Used~A&S Bone Casual
Plugins~
Eye Candy 3 (if you cant get 3 you can use 4 just a little different outcome)
Lokas Gel
Open a 600 x 600 new image with a white background. Open RR_Paper6.jpg copy and paste as a new image. Go to masks and click from image and choose your mask. Open RR_Frames5.pspimage copy and paste as a new image resize by 60%. Open RR_Flower2.pspimage copy and paste as a new image resize by 20%. Go to layers and duplicate it enough to go around the frame. Open RR_Lips1.pspimage copy and paste as a new image resize by 20%. Open RR_Lips2.pspimage copy and paste as a new image resize by 20%. Open RR_Guitar1.pspimage copy and paste as a new image resize by 50%. Go to image and rotate freestyle and rotate it by 30%. Go to layers and duplicate and go to image and mirror. Open RR_Wordart2.pspimage copy and paste as a new image resize by 50%. Open RR_EmoBunny.pspimage copy and paste as a new image resize by 30%. Open RR_ButterflySkull.pspimage copy and paste as a new image resize by 20%. Now we are going to add our name with these settings
Go To effects Plugins Lokas Gel
Do these settings~
Bevel Width~10
Bevel depth~100
Angle straight up and down
color overlay checked
Color~#B20DFF
Color opacity~100
highlight~#EDCBFF
shadow~#8500D2
Go To Effects, Plugins, Eye Candy 3~Glow With these Settings
Width~8
Opacity~100
Opacity dropoff~medium
Color~Black
Draw everywhere~unchecked
Now add your watermark and anything else to make it yours.
Thanks for stopping by please come again soon.
Wednesday, August 11, 2010
 Feel The Beat
1:13 PM | Posted by
Marie's Palace Of Tuts |
 Edit Post

Supplies Needed~
Feel The Beat Kit By Vicki (Pink Princess) You can get HERE
I used the art work of Ismael Rac which you can get a license HERE
Mask~Kirsty08-Mask-5-Feb08.jpg(Not sure where I got this. If this is yours please email me and tell me where to link to)
Font Used~Hipster
Open a 600 x 600 new image with a white background. Open pp9.png copy and paste as a new image. Go to masks and click from image and choose your mask. Open ele34.pspimage Resize to your liking. Open ele39.pspimage copy and paste as a new image and resize by 15%. Open ele27.pspimage copy and paste as a new image and resize by 15%. Open ele3.pspimage copy and paste as a new image and resize by 15%. Open ele59.pspimage copy and paste as a new image and resize by 50%. Now add your own tubes or your choosing. Now we are going to add name. and I used these settings
Go to Effects..3D effects...Inner bevel
Bevel~Triangle
Width~8
Smoothness~0
Depth~20
Ambience~0
Shininess~0
Color~#FF57C6
Angle~315
Intensity~50
Elevation~30
Go to effects, 3d effects, drop shadow. Use these settings
Vertical~2
Horizontal~ -2
Opacity~100
Blur~0
Color~Black
Now add your watermark and anything else to make it yours.
Thanks for stopping by please come again soon.
Tuesday, August 10, 2010
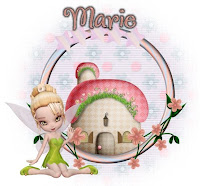
 Fairy Land
6:15 PM | Posted by
Marie's Palace Of Tuts |
 Edit Post
You Will need
Plugins~
Eye Candy 3
Lokas Gel
Mask~GridMask3byJenny.jpg you can find here
Font Used~Confection
Open a new image 600 x 600 with a White Background. Open WP_FL_PP16.jpg copy and paste as a new image. Go to masks and apply your mask. Open WP_FL_SWIRLFRAME.pspimage copy and paste as a new image. Open WP_FL_STARCLUSTER.pspimage now with these tube i took one of the stars and duplicated it 4 times and added it to the top of my frame. Open WP_FL_MUSHROOMHOUSE2.pspimage copy and paste as a new image resize by 60%. Open WP_FL_FLOWERVINE.pspimage copy and paste as a new image resize by 60%. Go to layers and duplicate and now image and mirror. Open WP_FL_FAIRY5.pspimage copy and paste as a new image resize by 60%. Now we are going to add our name with these settings
Go To effects Plugins Lokas Gel
Do these settings~
Bevel Width~10
Bevel depth~100
Angle straight up and down
Color overlay checked
Color~#D9998B
Color opacity~100
highlight~#F5E1DD
shadow~#8E4638
Go To Effects, Plugins, Eye Candy 3 With these Settings
Width~8
Opacity~100
Opacity dropoff~Thin
Color~Black
Draw everywhere~unchecked
Now add your watermark and anything else to make it yours.
Thanks for stopping by please come again soon.
 Thank You Tamie
12:27 PM | Posted by
Marie's Palace Of Tuts |
 Edit Post
Monday, August 9, 2010
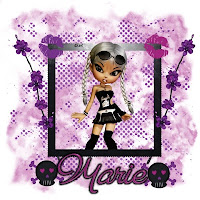
 You & Me Rocker Girl
8:14 PM | Posted by
Marie's Palace Of Tuts |
 Edit Post
Supplies Needed~
You & Me Kit By Bea Creations which you can get here
Mask~gemsmask31.jpg (Not sure where I got this. If this is yours please email me and tell me where to link to)
Font~Paradise Script 2
Plugins~
Eye Candy 3 (if you cant get 3 you can you 4 just a little different outcome)
Lokas Gel
Open a 600 x 600 new image with a white background. Open p07_bc_youandme.png copy and paste as a new image. Go to masks and apply your mask. Open deco05_bc_youandme.pspimage copy and paste as a new image. Go to layers duplicate go to image and flip then image and mirror. Open frame06_bc_youandme.pspimage copy and paste as a new image resize by 70%. Open kiss02_bc_youandme.pspimage copy and paste as a new image resize by 40%. Open kiss03_bc_youandme.pspimage copy and paste as a new image resize by 40%. Open flower11_bc_youandme.pspimage copy and paste as a new image resize by 75%. Open skull01_bc_youandme.pspimage copy and paste as a new image resize by 30%. Go to layers duplicate and image and mirror. Now we are going to add our name with these settings
Go To effects Plugins Lokas Gel
Do these settings~
Bevel Width~10
Bevel depth~100
Angle straight up and down
Color overlay checked
Color~#9E267D
Color opacity~100
highlight~#F6CEEB
shadow~#681A53
Go To Effects, Plugins, Eye Candy 3~Glow With these Settings
Width~8
Opacity~100
Opacity dropoff~medium
Color~Black
Draw everywhere~unchecked
Now add your watermark and anything else to make it yours.
Thanks for stopping by please come again soon.
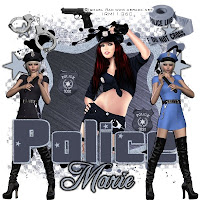
 Officer Girl
2:32 PM | Posted by
Marie's Palace Of Tuts |
 Edit Post
Supplies Needed~
Officer Kit by Tamie (Addictive Pleasures) You can get HERE
I used the art work of Ismael Rac which you can get a license HERE
Mask~GrungeMask4byJenny which you can get HERE
Scrap Templete by Tamie (Addictive Pleasures) You can get HERE
Posers used are by Roo which you can get HERE
Font Used~Freebooter Script
Plugins~
Eye Candy 3 (if you cant get 3 you can use 4 just a little different outcome)
Lokas Gel
Open a 600 x 600 new image with a white background. Open p1.png copy and paste as a new image. Go to masks and click from image and choose your mask. Open splatter.pspimage copy and paste as a new image and i had to resize by 125%. Open Temp 68 by Addictive Pleasures and I took out the special written on it and the big star in the middle. You leave what you want. Highlight The badge and click select all and paste into selection p3.png none select none. Open Handcuffs.pspimage copy and paste as a new image and resize by 60%. Open gun.pspimage copy and paste as a new image and resize by 30%. Open crime tape.pspimage copy and paste as a new image and resize by 40%. Open badge3.pspimage copy and paste as a new image and resize by 30%. Now choose your tube you want to add I choose Sexy Police Girl by Ismael Rac & Poser police girls by Roo. Now add your name and use these settings
Go To effects Plugins Lokas Gel
Do these settings~
Bevel Width~10
Bevel depth~100
Angle straight up and down
Color overlay checked
Color~#ABB6C7
Color opacity~100
highlight~#DBE1E9
shadow~#566070
Go To Effects, Plugins, Eye Candy 3 With these Settings
Width~8
Opacity~100
Opacity dropoff~Medium
Color~Black
Draw everywhere~unchecked
Now add your watermark and anything else to make it yours.
Thanks for stopping by please come again soon.
Thursday, August 5, 2010
 Black Widow
11:09 AM | Posted by
Marie's Palace Of Tuts |
 Edit Post
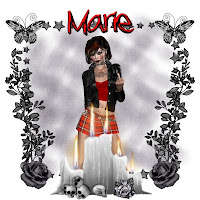
Supplies Needed~
Black Widow Kit By Vicki (Pink Princess) You can get HERE
S.T.F.U Poser by Roo which you can get HERE
Mask~gemsmask12.jpg (Not sure where I got this. If this is yours please email me and tell me where to link to)
Font Used~Kosal Says Hy
Open a 600 x 600 new image with a white background. Open pp11.png copy and paste as a new image. Go to masks and click from image and choose your mask. Open frame of your choice copy and paste as a new image. Open ele29.pspimage and paste as a new image resize by 75%. Open ele24.pspimage copy and paste as a new image and resize by 30%. Go to layers and duplicate and go to image and mirror. Open ele23.pspimage copy and paste as a new image resize by 70%. Open ele28.pspimage copy and paste as a new image. Resize by 40%. Go to layers and duplicate and go to image and mirror. Now we are going to add name. and I used these settings
Go to Effects..3D effects...Inner bevel
Bevel~Triangle
Width~8
Smoothness~0
Depth~20
Ambience~0
Shininess~0
Color~white
Angle~315
Intensity~50
Elevation~30
Go to effects, 3d effects, drop shadow. Use these settings
Vertical~2
Horizontal~ -2
Opacity~100
Blur~0
Color~Black
Now add your watermark and anything else to make it yours.
Thanks for stopping by please come again soon.
 Rockalicious
10:38 AM | Posted by
Marie's Palace Of Tuts |
 Edit Post
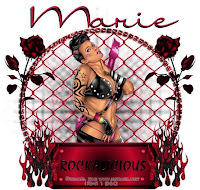
Supplies Needed~
Rockalicious Kit by Tamie (Addictive Pleasures) You can get HERE
I used the art work of Ismael Rac which you can get a license HERE
Mask~diamond3dee-vi.jpg (Not sure where I got this. If this is yours please email me and tell me where to link to)
Font Used~International Palms
Open a 600 x 600 new image with a white background. Open p5.png copy and paste as a new image. Go to masks and click from image and choose your mask. Open GemFrame.pspimage copy and paste as a new image. Resize by 90%. Open Wire2.pspimage and paste as a new image resize by 65%. Open rose.pspimage copy and paste as a new image and resize by 65%. Go to layers and duplicate and go to image and mirror. Open plate.pspimage copy and paste as a new image resize by 75%. Open flames2.pspimage copy and paste as a new image. Resize by 40%. Go to layers and duplicate and go to image and mirror. Now we are going to add name. and I used these settings
Go to Effects..3D effects...Inner bevel
Bevel~Triangle
Width~8
Smoothness~0
Depth~20
Ambience~0
Shininess~0
Color~white
Angle~315
Intensity~50
Elevation~30
Go to effects, 3d effects, drop shadow. Use these settings
Vertical~2
Horizontal~ -2
Opacity~100
Blur~0
Color~Black
Now add your watermark and anything else to make it yours.
Thanks for stopping by please come again soon.
Wednesday, August 4, 2010
 Fantasy Fairy
1:05 PM | Posted by
Marie's Palace Of Tuts |
 Edit Post
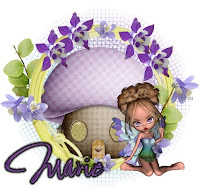
Supplies Needed~
Fantasy Fairy Scrap Kit by Bello Scarto You can get HERE
Poser was in the scrap kit by MEDIEVIL CREATIONS
Font Used~SassyFrass ROB
Mask Used Pbs-Circlemask3.jpg (Not sure where I got this. If this is yours please email me and tell me where to link to)
Plugins~
Eye Candy 3 (if you cant get 3 you can use 4 just a little different outcome)
Lokas Gel
Open a New Image. I like my images about 600 x 600, White background.
Open bs-ff-paper9.jpg copy and paste as a new image, make sure your mask is at the bottom of the screen. Go to Masks, from image, choose your mask name, Click ok. Open bs-ff-element21.pspimage copy and paste as a new image, Resize by 85%. Open bs-ff-element16.pspimage copy and paste as a new image, resize by 30%. Go to layers duplicate and place them where you like. Open bs-ff-medi_pythia7.pspimage copy and paste as a new image, resize by 30%.
Now add your name with color of your choice I will be using Blue.
Go To effects Plugins Lokas Gel
Do these settings~
Bevel Width~10
Bevel depth~100
Angle straight up and down
Color overlay checked
Color~#713092
Color opacity~100
highlight~#DEC8EA
shadow~#401C52
Go To Effects, Plugins, Eye Candy 3 With these Settings
Width~8
Opacity~100
Opacity dropoff~Medium
Color~Black
Draw everywhere~unchecked
Monday, August 2, 2010
 Starlicious
1:23 PM | Posted by
Marie's Palace Of Tuts |
 Edit Post
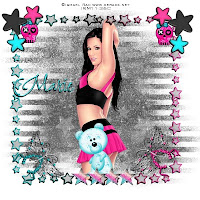
Supplies Needed~
Starlicious Scrap Kit by Rieka_Rafita You can get HERE
Mask Used Gemsmask-2.jpg (Not sure where I got this. If this is yours please email me and tell me where to link to)
Font Used~Shalimar Swash
I used the art work of Ismael Rac which you can get a license HERE
Plugins~
Eye Candy 3 (if you cant get 3 you can use 4 just a little different outcome)
Lokas Gel
Open a 600 x 600 new image with a white background. Open RR_Paper14.jpg copy and paste as a new image. Go to masks and click from image and choose your mask. Open RR_Frame2.pspimage copy and paste as a new image. Go to effects, 3d effects, drop shadow. Use these settings
Vertical~2
Horizontal~ -2
Opacity~100
Blur~0
Color~Black
Open RR_Butterfly4.pspimage and paste as a new image resize by 40%. Go to image rotate and freestyle by 60%. Go to effects, 3d effects, drop shadow. Use these settings
Vertical~2
Horizontal~ -2
Opacity~100
Blur~0
Color~Black
Open RR_Butterfly3.pspimage copy and paste as a new image and resize by 40%. Go to image rotate and freestyle by 60%. Go to effects, 3d effects, drop shadow. Use these settings
Vertical~2
Horizontal~ -2
Opacity~100
Blur~0
Color~Black
Open RR_Star4.pspimage copy and paste as a new image resize by 20%. Go to layers and duplicate 3 times. Open RR_Star5.pspimage copy and paste as a new image resize by 40%. Go to image rotate and freestyle by 60%. Go to layers and duplicate, go to image and mirror. Open RR_Skull1.pspimage copy and paste as a new image resize by 20%. Go to layers and duplicate, go to image and mirror. Open RR_Bear.pspimage copy and paste as a new image resize by 40%. Now choose your tube you want to add I choose Cool Skirt by Ismael Rac. Now adding the name with these settings
Go to Effects 3d Effects~Inner bevel with these settings
Bevel~Triangle
Width~8
Smoothness~0
Depth~20
Ambience~0
Shininess~0
Color~white
Angle~315
Intensity~50
Elevation~30
Go to effects, 3d effects, drop shadow. Use these settings
Vertical~2
Horizontal~ -2
Opacity~100
Blur~0
Color~Black
Now add your watermark and anything else to make it yours.
Thanks for stopping by please come again soon.
Subscribe to:
Posts (Atom)