Page Views
Contributors

- Marie's Palace Of Tuts
- Hi all my name is Marie. I haven't been doing tuts very long but I have been making tags for about 8 years now. I am disabled. I am a 26 year old. I still live at home with my mom. She is my world. I hope you like it here. If you have any questions or comments email me at PunkLilAngel778@yahoo.com
Monday, September 27, 2010
 Weeping Heart
3:42 PM | Posted by
Marie's Palace Of Tuts |
 Edit Post
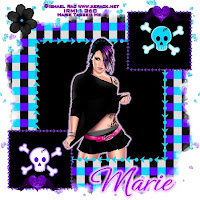
Supplies Needed~
Weeping Heart by Tammy You can get HERE
I used the art work of Ismael Rac which you can get a license HERE
Scrap Templete by BamaBrandi you can get HERE
Mask by Chelle which can be found HERE
Font Used~Ephesis
Open a 600 x 600 new image with a white background. Open the scrap Templete and hit shift and D and close out the oringial. Open Weeping Heart Paper 3.jpg copy and paste as a new image. Go to masks and apply. Now copy over ur scrap temp layers. Make the mid arrow border baby blue. Bt Left & Right Top arrows change color to purple. Open Weeping Heart Skull 1.pspimage copy and paste as a new image and resize by 20%. Open Weeping Heart Skull 2.pspimage copy and paste as a new image and resize by 20%. Open Weeping Heart Heart With Wings 1.pspimage copy and paste as a new image and resize by 20%. Go to layers and duplicate. Open Weeping Heart Flower 5.pspimage copy and paste as a new image and resize by 20%. Open Weeping Heart Glitter Confetti.pspimage copy and paste as a new image and go to layers and move right above the background. Open Weeping Heart Glitter Confetti 2.pspimage copy and paste as a new image and go to layers and move right above the background. Now we are going to add our name with these settings
Go To effects Plugins Lokas Gel
Do these settings~
Bevel Width~10
Bevel depth~100
Angle straight up and down
Color overlay checked
Color~#B20DFF
Color opacity~100
highlight~#EDCBFF
shadow~#8500D2
Go To Effects, Plugins, Eye Candy 3 With these Settings
Width~8
Opacity~100
Opacity dropoff~Medium
Color~#F4DEFE
Draw everywhere~unchecked
Now add your watermark and anything else to make it yours.
Thanks for stopping by please come again soon.
Thursday, September 23, 2010
 Morgana
1:08 PM | Posted by
Marie's Palace Of Tuts |
 Edit Post

Supplies Needed~
Morgana Kit By Vicki (Pink Princess) You can get HERE
I used the art work of Elias Chatzoudis which you can get a license HERE
Mask~
gemsmask12.jpg(Not sure where I got this. If this is yours please email me and tell me where to link to)
Font Used~Ephesis
Open a 600 x 600 new image with a white background. Open pp6.png copy and paste as a new image. Go to mask and apply. Open ele9.pspimage copy and paste as a new image resize by 60%. Open ele20.pspimage copy and paste as a new image resize by 30%. Go to layers and duplicate. go to image and mirror. Open ele1.pspimage copy and paste as a new image resize by 20%. Go to layers and duplicate. go to image and mirror. Open ele38.pspimage copy and paste as a new image resize by 15%. Go to layers and duplicate. go to image and mirror. Open ele28.pspimage copy and paste as a new image resize by 30%. Go to layers and duplicate. go to image and mirror. Open ele29.pspimage copy and paste as a new image resize by 60%. Now we are going to add our name with these settings
Go To effects Plugins Lokas Gel
Do these settings~
Bevel Width~10
Bevel depth~100
Angle straight up and down
Color overlay checked
Color~#B62F80
Color opacity~100
highlight~#F4CCE5
shadow~#5D1742
Go To Effects, Plugins, Eye Candy 3 With these Settings
Width~8
Opacity~100
Opacity dropoff~Medium
Color~Black
Draw everywhere~unchecked
Now add your watermark and anything else to make it yours.
Thanks for stopping by please come again soon.
Tuesday, September 21, 2010
 Girly Punk Diva
2:28 PM | Posted by
Marie's Palace Of Tuts |
 Edit Post

Supplies Needed~
DigiMania-Swizzler Kit by DigiMania You can get HERE
Mask~Vix_Mask404.jpg you can find here
Font Used~Spring
Scrap Templete by Scrap Rebellion which you can get HERE
Poser by Wyked Soulz which you can get HERE
Plugins~
Eye Candy 3 (if you cant get 3 you can use 4 just a little different outcome)
Lokas Gel
Open a 600 x 600 new image with a white background. Open the scrap Templete and hit shift and D and close out the oringial. Change the bottom frame to baby blue. Change circle to #FC9ED1. Change Circle Frame to baby blue. and add glow with these settings. Go To Effects, Plugins, Eye Candy 3 With these Settings
Width~8
Opacity~100
Opacity dropoff~Thin
Color~Black
Draw everywhere~unchecked
Change tall rectangle to #BE84CC. Change rectangle frame to baby blue and Go To Effects, Plugins, Eye Candy 3 With these Settings
Width~8
Opacity~100
Opacity dropoff~Thin
Color~Black
Draw everywhere~unchecked
Open DigiMania-Swizzler-Paper 4.png copy and paste into selection. Frame should be hot pink and add Go To Effects, Plugins, Eye Candy 3 With these Settings
Width~8
Opacity~100
Opacity dropoff~Thin
Color~Black
Draw everywhere~unchecked
Open DigiMania-Swizzler-Doodle.pspimage copy and paste as a new image resize by 80%. Go To Effects, Plugins, Eye Candy 3 With these Settings
Width~8
Opacity~100
Opacity dropoff~Thin
Color~Black
Draw everywhere~unchecked
Now go to layers and duplicate and go to image and mirror. Open DigiMania-Swizzler-Skull Brad 3.pspimage copy and paste as a new image resize by 30%. Open DigiMania-Swizzler-Madam Butterfly.pspimage copy and paste as a new image resize by 30%. Open DigiMania-Swizzler-Diva wordart.pspimage copy and paste as a new image resize by 60%. Open DigiMania-Swizzler-Heart.pspimage copy and paste as a new image resize by 40%. Now we are going to add our name with these settings
Go To effects Plugins Lokas Gel
Do these settings~
Bevel Width~10
Bevel depth~100
Angle straight up and down
Color overlay checked
Color~#BE84CC
Color opacity~100
highlight~#E9D6EE
shadow~#7E468E
Go To Effects, Plugins, Eye Candy 3 With these Settings
Width~8
Opacity~100
Opacity dropoff~Thin
Color~Black
Draw everywhere~unchecked
Now add your watermark and anything else to make it yours.
Thanks for stopping by please come again soon.
Friday, September 10, 2010
 Trick Witch
5:57 PM | Posted by
Marie's Palace Of Tuts |
 Edit Post
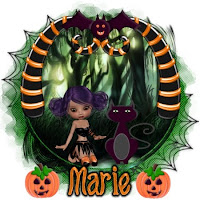
Supplies Needed~
Trick Witch Scrap Kit by Roo You can get HERE
Cookie by Roo came in the kit
Mask ~WSL_Mask219.jpg
Scenic image of your choice
Font Used~Craggy Bold
Plugins~
Eye Candy 3 (if you cant get 3 you can you 4 just a little different outcome)
Lokas Gel
Open a 450 x 450 new image with a white background. Open TW_TS_SBR08.pspimage copy and paste as a new image. Recolor to black. Resize to your liking and duplicate it. Open TWp_TS_SBR03.jpg copy and paste as a new image. Go to masks and apply. I used a scarey woody image. I used a rounded mask on this you can use what you choose. Open TW_TS_SBR12.pspimage copy and paste as a new image and resize by 40%. Go to layers and duplicate, also go to image and mirror. Open TW_TS_SBR34.pspimage copy and paste as a new image and resize by 40%. Open TW_TS_SBR48.pspimage copy and paste as a new image and resize by 40%. Open TW_TS_SBR10.pspimage copy and paste as a new image and resize by 20%. Open TW_TS_SBR45.pspimage copy and paste as a new image and resize by 20%. Now we are going to add our name with these settings
Go To effects Plugins Lokas Gel
Do these settings~
Bevel Width~10
Bevel depth~100
Angle straight up and down
Color overlay checked
Color~#FB7C0B
Color opacity~100
highlight~#FCD4B0
shadow~#A34D01
Go To Effects, Plugins, Eye Candy 3 With these Settings
Width~8
Opacity~100
Opacity dropoff~Medium
Color~Black
Draw everywhere~unchecked
Now add your watermark and anything else to make it yours.
Thanks for stopping by please come again soon.
Wednesday, September 8, 2010
 Swizzler
4:37 PM | Posted by
Marie's Palace Of Tuts |
 Edit Post

Supplies Needed~
DigiMania-Swizzler Kit by DigiMania You can get HERE
Mask~masker1patricia.jpg you can find here
Font Used~Vujahday Script
I used the art work of Ismael Rac which you can get a license HERE
Plugins~
Eye Candy 3 (if you cant get 3 you can use 4 just a little different outcome)
Lokas Gel
Open a 450 x 450 new image with a white background. Open DigiMania-Swizzler-Paper 8.png copy and paste as a new image. Go to masks and apply your mask. Open DigiMania-Swizzler-Scolloped Frame 3.pspimage copy and paste as a new image and resize by 60%. Open DigiMania-Swizzler-Madam Butterfly.pspimage copy and paste as a new image and resize by 20%. Go to layers and duplicate. Open DigiMania-Swizzler-Swizzler Wordart.pspimage copy and paste as a new image and resize by 50%. Open DigiMania-Swizzler-Heart.pspimage copy and paste as a new image and resize by 60%. Go to layers and duplicate. Open DigiMania-Swizzler-Doodle.pspimage copy and paste as a new image and resize by 60%. Go to layers and duplicate. Open DigiMania-Swizzler-Skull Brad 3.pspimage copy and paste as a new image and resize by 30%. Go to layers and duplicate. Open DigiMania-Swizzler-Lips.pspimage copy and paste as a new image and resize by 15%. Go to layers and duplicate. Now we are going to add our name with these settings
Go To effects Plugins Lokas Gel
Do these settings~
Bevel Width~10
Bevel depth~100
Angle straight up and down
Color overlay checked
Color~#4DC1E6
Color opacity~100
highlight~#E1F5FB
shadow~#1C91B2
Go To Effects, Plugins, Eye Candy 3~Glow With these Settings
Width~8
Opacity~100
Opacity dropoff~Medium
Color~Black
Draw everywhere~unchecked
Now add your watermark and anything else to make it yours.
Thanks for stopping by please come again soon.
Tuesday, September 7, 2010
 Chocolate Lover
3:07 PM | Posted by
Marie's Palace Of Tuts |
 Edit Post
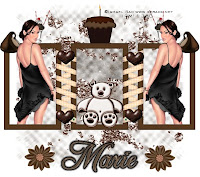
Supplies Needed~
Chocolate Lovers Kit by Rieka_Rafita You can get HERE
Mask~Grunge Mask4_Rose you can find here
Font Used~Freebooter Script
I used the art work of Ismael Rac which you can get a license HERE
Plugins~
Eye Candy 3 (if you cant get 3 you can use 4 just a little different outcome)
Lokas Gel
Open a 600 x 600 new image with a white background. Open RR_Paper12.jpg copy and paste as a new image. Go and apply the mask. Open RR_Frames1.pspimage copy and paste as a new image. Open RR_ChocolateBear.pspimage copy and paste as a new image and resize by 50%. Open RR_Cupcake.pspimage copy and paste as a new image and resize by 30%. Open RR_HersheyKiss4.pspimage copy and paste as a new image and resize by 30%. Go to layers and duplicate. Open RR_Chocolate6.pspimage copy and paste as a new image and resize by 10%. Go to layers and duplicate so you have 4. Open RR_Flower3.pspimage copy and paste as a new image and resize by 25%. Go to layers and duplicate. Now we are going to add our name with these settings
Go To effects Plugins Lokas Gel
Do these settings~
Bevel Width~10
Bevel depth~100
Angle straight up and down
Color overlay checked
Color~#664C33
Color opacity~100
highlight~#CCB094
shadow~#443322
Go To Effects, Plugins, Eye Candy 3~Glow With these Settings
Width~8
Opacity~100
Opacity dropoff~medium
Color~Black
Draw everywhere~unchecked
Now add your watermark and anything else to make it yours.
Thanks for stopping by please come again soon.
Wednesday, September 1, 2010
 Sinister Kisses
3:24 PM | Posted by
Marie's Palace Of Tuts |
 Edit Post
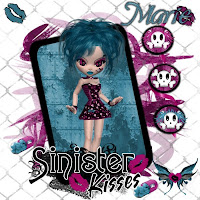
Supplies Needed~
Sinister Kisses Scrap Kit by Roo You can get HERE
Cookie by Roo you can get HERE
Scrap Templete by Roo Can be downloaded HERE
Mask ~Vix_Mask359.jpg(Not sure where I got this. If this is yours please email me and tell me where to link to)
Font Used~Saliere
Plugins~
Eye Candy 3 (if you cant get 3 you can you 4 just a little different outcome)
Lokas Gel
Open a 600 x 600 new image with a white background. Open the scrap Templete and hit shift and D and close out the oringial. Now the way i did this was remove the mask layer, the X's layer, the wordart layer, and the lip layers. Open SKp_ST-SBR01.jpg copy and paste as a new image and now go to layers and arrange and move to the bottom now go to layers arrange and move up. That way it should be showing right above the white background. Go to Mask and apply it to the paper. Now select Rectangle White Frame and flood fill with black same with the Circle Outline. Select Rectangle Inner, copy SKp_ST-SBR09.jpg and paste in to selection. Open SK_ST-SBR25.pspimage copy and paste right above the mask layer. Open SK_ST-SBR02.pspimage copy and paste as new image resize by 30%. Open SK_ST-SBR35.pspimage copy and paste as new image resize by 35%. Open SK_ST-SBR36.pspimage copy and paste as new image resize by 35%. Open SK_ST-SBR37.pspimage copy and paste as new image resize by 35%. Open SK_ST-SBR52.pspimage copy and paste as new image resize by 35%. Open SK_ST-SBR51.pspimage copy and paste as new image resize by 35%. Open SK_ST-SBR03.pspimage copy and paste as new image resize by 35%. Now we are going to add our name with these settings
Go To effects Plugins Lokas Gel
Do these settings~
Bevel Width~10
Bevel depth~100
Angle straight up and down
Color overlay checked
Color~#46859E
Color opacity~100
highlight~#C6DDE6
shadow~#2A4A58
Go To Effects, Plugins, Eye Candy 3~Glow With these Settings
Width~8
Opacity~100
Opacity dropoff~Thin
Color~Black
Draw everywhere~unchecked
Now add your watermark and anything else to make it yours.
Thanks for stopping by please come again soon.
Subscribe to:
Posts (Atom)